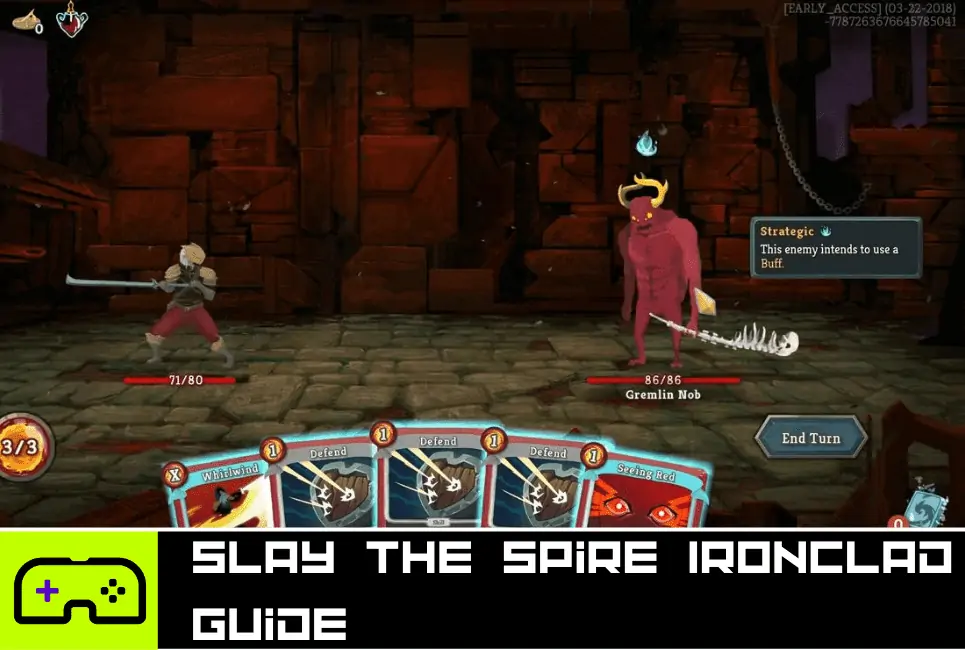
Slay the Spire allows you to play as any one of four unique characters – The Ironclad, The Silent, The Defect, and The Watcher. They’re all exciting in their own way, but The Ironclad is my favorite. I find his plays to be the most interesting, and while he’s not necessarily the best, he’s certainly the most fun.
There’s something very nostalgic about playing as The Ironclad. He’s the first character available when you start the game, and so he’s your first introduction to Slay the Spire. While I dally with the others, I always find myself coming back to The Ironclad. I find that he’s best suited for more casual runs, although you can get tactical if you want to.
If you’re a beginner to Slay the Spire, then The Ironclad is the ideal place to perfect your combat techniques. However, he still poses a fun challenge for veteran players as well. Read on our Slay the Spire Ironclad Guide to learn all about this fascinating character!
Embark on a thrilling journey through the ever-shifting halls of Slay the Spire, where strategic deck-building meets intense roguelike action. With its dynamic challenges and endless combinations, test your skills and adaptability to ascend to greatness.
Getting to Know The Ironclad
- Starting HP – 80/80
- Starting Deck – Strike x5, Defend x4, Bash x1
- Specialty Decks – Strength, Exhaust, HP Loss
- Unique Form Card – Demon Form
- Card Border Color – Red
- How to Unlock – The Ironclad is available at the start of the game without needing to be unlocked
Who is The Ironclad?
As is evidenced by his intimidating stance, The Ironclad is, first and foremost, a warrior. He is said to be the last of a tribe that is now all but extinct. His excessive Strength is rumored to be the result of a deal he made with demons, and his power is derived from supernatural means. However, those very same demons supposedly used The Ironclad as a weapon to massacre the rest of his tribe.
In terms of story lore, The Ironclad ventured into the Spire and died inside, killed by the many dark beings lurking within. However, Neow (a mystical whale you encounter at the beginning of each run) resurrected him, and now he serves her in her attempts to slay the Spire.
Visually, he has a simplistic design, but a really effective one. He wears a dull-gold curved mask that comes to a point at the front, and this hides his facial expressions, creating an air of intrigue. The eye slits are a vibrant, fiery gold that appear almost orange against the muted tone of the mask. Long, wavy white hair is visible from the back, stopping just below his shoulders.
The shoulders themselves are protected by pads in that same color of dull gold as the mask, which also matches the top of his boots. He wears red breeches tucked away inside his boots, which are gray below the collar. In his hands, he wields a long silver sword with an oddly-shaped tip that points sideways, almost like a talon.

What are the Specialties of The Ironclad?
Each of the characters in Slay the Spire has certain gameplay specialties. For the Ironclad, his specialties are well suited to being a warrior. He has the highest HP of any of the characters, starting at a base of 80 HP. There are also relics that heal HP, such as the starting Relic, Burning Blood, and its upgrade, Black Blood.
As well as this, there’s a fun Ironclad card known as Feed, which raises your max HP by three every time you use it to kill an enemy (it has to deliver the fatal blow itself). The higher HP makes up for the general lack of Block cards as compared to other characters.
Having that higher HP allows you to focus more on doing serious damage to your opponents. You do this using a mechanic known as Strength. This raises the damage you deal by 1 point for each Strength that you have. This may not sound a lot, but believe me, it stacks. One damage on its own doesn’t mean much, but throughout a combat encounter, you’ll likely attack at least 10 – 20 times, so you can see having that higher Strength would potentially save you an entire turn, and that’s just with 1.
Using the right combinations, you can get well over 100 Strength with The Ironclad. It can take a few turns to stack it up, but once you’ve got your Strength high enough, killing enemies becomes a total breeze.
Another mechanic that The Ironclad excels at is Exhausting. At first glance, this sounds counter-intuitive. Exhausting cards means that you play them once, and then they’re gone until the end of combat rather than just ending up in your discard pile, kind of like how banishing works in Yu-Gi-Oh.
You might think, “well, why would I want to waste all of my cards?” but be patient. You see, Exhaust cards can have some fascinating effects that encourage progress, such as drawing cards, dealing damage, or earning Block whenever a card is exhausted.
Unique Relics
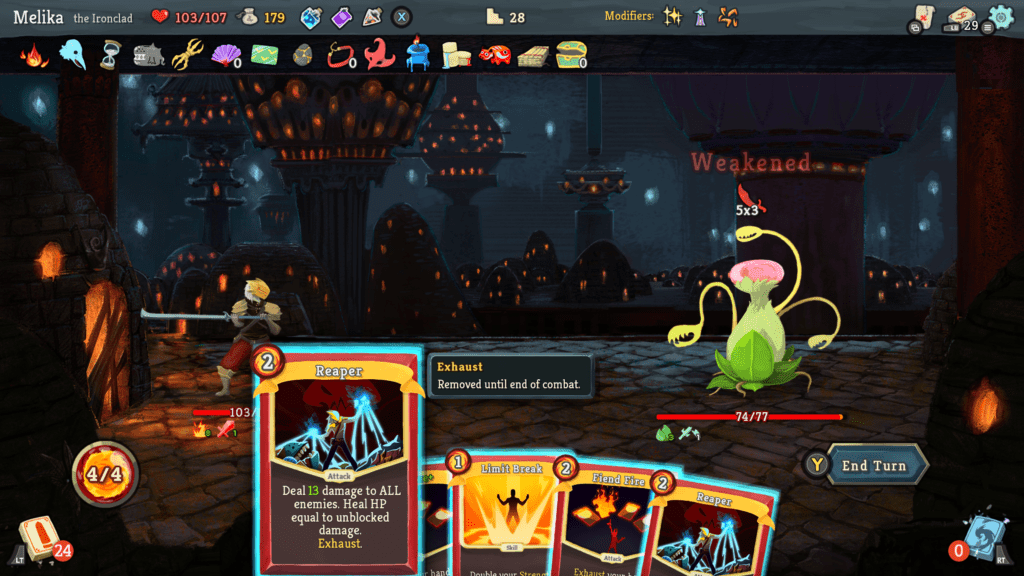
Each character comes with their own starting Relic, and for The Ironclad, that’s Burning Blood. This allows you to heal 6 HP at the start of each combat and can be especially useful in the early floors, where you won’t be taking too much damage. You may receive the option to upgrade to a Boss Relic called Black Blood at some point. This will replace your starting Relic but heals 12 HP after each combat instead of just 6.
There are also several other unique Relics for The Ironclad, which I’ll summarize below. I won’t give the official write-up for each one as that information is already out there, but instead, I’ll talk about when they’d be useful. I’ve linked the official Wiki page for all of them so you can see each in more detail if interested.
- Mark of Pain (Boss Relic) – This one gives you extra energy, which is vital for playing higher-cost cards. The Ironclad, in particular, has many expensive cards such as Demon Form, Corruption, and Barricade. The downside of this is that you get Wounds in your draw pile, which work as deck clutter. However, in an Exhaust deck, this can work to your advantage, as they’re cards that you can Exhaust for a bonus, without losing anything useful. In the right deck, it’s worth it for the extra energy, but not if your deck is small.
- Runic Cube (Boss Relic) – This is particularly useful in burn decks that utilize cards like Offering, which lower your HP. Ruin Cube allows you to draw a card every time you lose HP, including when enemies attack you. Those extra cards can help you optimize your plays, as you’ll have more options.
- Brimstone (Shop Relic) – Only available by purchasing it through the Merchant, Brimstone is high risk and high reward. I’ll be honest; I’m not usually brave enough to get this one, as I prefer other methods of raising my Strength that doesn’t also buff my enemies. However, if you’re not a coward like me, it is generally considered an incredibly powerful Relic.
- Champion Belt (Rare Relic) – This one is essentially a Block Relic in the right deck. If you have lots of cards or Relics that apply Vulnerable, then you’re essentially weakening your enemy at the same time, meaning you only take 75% damage. Seeing as Dexterity is one of the Ironclad’s main weaknesses, this can be useful for conserving HP.
- Charon’s Ashes (Rare Relic) – This one is incredibly powerful when used in an Exhaust deck, as you’ll be able to trigger it multiple times each turn. It affects all enemies and is especially useful when in combat with multiple targets.
- Magic Flower (Rare Relic) – while decent on paper, it tends not to be particularly effective simply because most decks won’t have many healing mechanics. However, if you get it early on, you can try and get a few copies of Reaper to work with it, and build your deck around those. It’s convenient in a burn deck, though, as it’ll help you recover quicker.
- Paper Phrog (Uncommon Relic) – If you have a few cards in your deck that deal Vulnerable, then this Relic can quickly become a game-changer, especially if you have a high Strength modifier. It’s certainly worth building around if you get it early on.
- Self-Forming Clay (Uncommon Relic) – You have much less control over which Relics you get compared to cards, which is a shame, as this is a staple of a decent burn deck. However, it doesn’t have as much use in other decks and isn’t as convenient as other, more exciting Relics.
- Red Skull (Common Relic) – This one’s not particularly noteworthy. If you’ve got good deck synergy, you shouldn’t often find yourself below 50% HP, and if you do, then I’d like to hope that you’ve got enough Strength to show for it that three additional Strength would make little difference. Still, with the relative lack of Block cards, you could possibly lose a lot of HP early when facing a tough enemy, in which case Red Skull could help you level the field.
Best Deck Builds
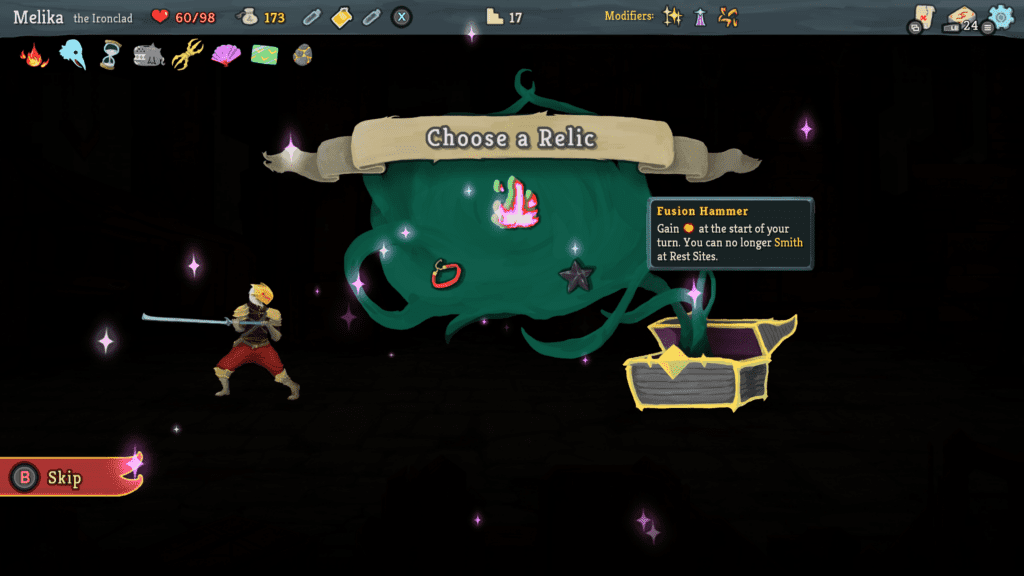
There are countless tactics for deck strategies, and many clever builds are possible. As everyone has a different play style, what works for one person might not necessarily work for you. So with this, I’m not going to dictate exactly which cards you should have in your deck.
Instead, I’ll talk through three of the main methods in a broad sense, and suggest possible core cards to build your deck around.
My personal go-to is a Strength scaling deck, but the others can be fun as well, and you can even combine elements from all three to make a hybrid deck.
Strength
This is where The Ironclad really shines over all the other characters. Ultimately, regardless of who you choose, your goal is to damage the enemy as much as possible as quickly as possible. And a Strength scaling deck allows you to do that and then some.
It’s not as effective on the earlier enemies, who typically have lower HPs, as Strength decks take a few turns to get going. However, when you find yourself up against Elites and Bosses, Strength decks can be exceptionally effective.
I recently played a modded run with a Strength deck, and I beat the Act 3 Boss in under eight turns, while recovering nearly all of my HP using Reaper.
- Demon Form – A perfect example of high cost, high reward. Demon Form costs three energy to use, so unless you have a Relic that gives bonus energy, playing this will probably constitute your entire turn. However, after that, your Strength will raise considerably every turn. I recommend upgrading this before anything else, as it increases from 2 Strength per turn to 3 Strength per turn.
- Limit Break – An absolute necessity in a Strength deck. Although it’s technically a rare card, Slay the Spire tends to provide this relatively frequently in card rewards/ Merchant stock. This doubles your Strength, which doesn’t mean much in the early rounds, but can create insane numbers after a few turns. This Exhausts when used in its base form, so you should upgrade this whenever possible so you can use it multiple times each combat. Try to stack as many of these in your deck as possible (within reason, you don’t want them forming more than 1/4 of your deck).
- Heavy Blade – While not as great in its base form due to its two energy cost, Heavy Blade allows you to make use of all that extra Strength. It’s worth having an upgraded copy in your deck, but modifying cards like Demon Form or Limit Break should take preference. Don’t collect more than 2 or 3 of these though, as they may end up too hard to play due to the energy cost.
- Sword Boomerang – A fantastic option, and particularly useful when in combat with only one enemy, or multiple enemies on low health. The randomness may work against you, but it’s still cheap and incredibly effective with high Strength. It’s a common card, so you’ll likely find one early in your run.
- Double Tap – While only mildly useful in early turns, it can be a combat-ender once you have high Strength, especially when used with powerful higher-energy cost cards like Heavy Blade. Be warned, though, it doesn’t work well with cards like Sword Boomerang or Pummel, as it will only do one extra attack rather than replaying the card.
- Pummel – This one Exhausts, so you’ll want to wait until your Strength is high enough that it’ll make a difference. However, the ability to hit an enemy multiple times with your high Strength modifier is an opportunity that’s not to be passed up.
- Reaper – This one is necessary to recover the HP you’ll inevitably lose. Typically, Strength decks contain fewer skills, so you’re unlikely to accumulate much Block on your turns. While this means you take more damage, Reaper can mitigate this. Usually, it only recovers a small amount, but if you have a high Strength modifier, you’ll be able to heal to full with no issue at all.

Exhaust
While other characters do have cards that Exhaust, The Ironclad is the best character for building a deck around this mechanic. Exhausting cards can be a neat way to whittle your deck down to its core elements while gaining powerful effects. Ideally, you’ll want cards that provide extra drawing power, so you can really make the most of each turn.
Not all the cards in an Exhaust deck need to be specifically related to the mechanic, and (especially if you choose Corruption) you’ll want to have some Skills in there to give you Block. Also, when it comes to upgrading, don’t waste it on any Powers unless it improves the potency of the effect rather than just reducing the cost. You’ll only be playing them once per combat, and there will definitely be better cards in your deck to upgrade.
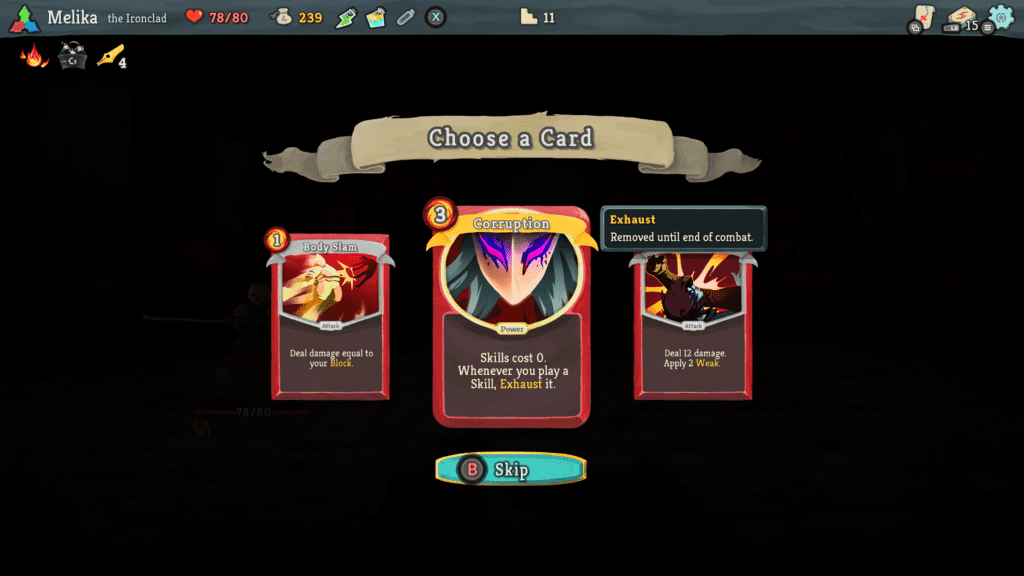
- Corruption – All the veteran players swear by Corruption, and even the game’s developer describes the combos it provides as ‘obscene.’ It makes all your Skills cost 0 and also Exhausts them. This can be great for playing more expensive Skills such as Impervious. It also will trigger any of your effects that occur upon Exhausting. It costs three energy to play in the first place, but as it’s a Power, it’ll be with you until the end of combat.
- Feel No Pain – An excellent way to gain Block, it triggers every time you Exhaust a card. Not much else to say about this one, except that it’s cheap at only one energy cost, and as a Power, it’s very convenient to play as early as possible.
- Fiend Fire – This one is a double-edged sword, and choosing the right time to play it will be the key to success with this one. It can deal a lot of damage and trigger a lot of effects, but you want to ensure you’re not using it to Exhaust any cards that would be useful that turn.
- Dark Embrace – This right here is how you get that drawing power I mentioned earlier. If you’ve built your deck right, you should be Exhausting multiple times each turn, meaning that Dark Embrace can help you cycle through your deck and get to the perfect cards.
- Exhume – There may be some cards in your deck that you wish to play more than once, but alas, they get Exhausted as soon as they’re played. That’s where Exhume comes in. This allows you to get back any one of your Exhausted cards, and not just that, but it’s placed straight in your hand for you to play that turn if you wish.
- Charon’s Ashes – This Relic is an effective way to passively damage your enemies; Charon’s Ashes is especially good in Corruption or Fiend Fire decks where the Exhausting will be happening rapidly.
- Dead Branch – Similar to Dark Embrace, Dead Branch lets you get a new card in your hand whenever one is Exhausted. However, this Relic doesn’t draw from your deck. Instead, it provides you with a random card from The Ironclad’s card database. This can result in you getting really powerful cards, but it can also cause deck clutter. If you pick up Dead Branch, you’ll want a way to Exhaust other cards in your hand, such as with Fiend Fire or True Grit.
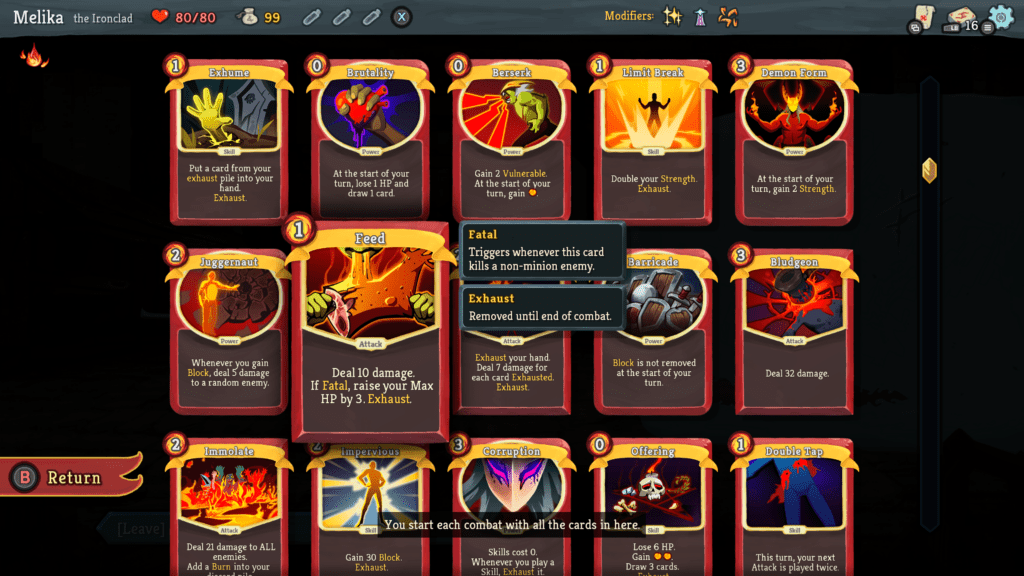
Burn (HP Loss)
Typically referred to as an HP Loss deck, I came to Slay the Spire from other card games such as Yugioh, so I call these burn decks. Anyway, the purpose here seems counter-productive at first. You do damage to your own HP. While it seems crazy to intentionally hurt yourself, when used correctly, you can get some incredible synergies going.
You see, several cards that offer you tangible benefits for dealing low-level damage to yourself. There are also other cards and Relics that help mitigate any damage done, or give you extra rewards when that happens. Below are some core cards and Relics to look out for when building a good Burn deck.
- Reaper – You’re going to need this one if you want to heal some of the damage done to you by losing HP, and in its upgraded form, you can heal base 5 HP per enemy, as well as deal a bit of damage.
- Offering – It’ll cost you 6 HP to use, but in return, you get two energy and three cards drawn from your deck. It also costs 0 energy to use, so the benefits outweigh the drawbacks when used correctly.
- Rupture – As a Power card, it means you only have to play it once, and then you gain its effects for the rest of combat. This should be a priority to upgrade, as then it’ll allow you to gain 2 Strength every time you lose HP due to a card (which should happen frequently).
- Brutality – Extra drawing power is always useful, and while losing 1 HP per turn may be a bit inconvenient in other decks, it’s ideal for a burn deck.
- Combust – This does passive damage to all your enemies every turn, while also triggering any effects you have from losing HP.
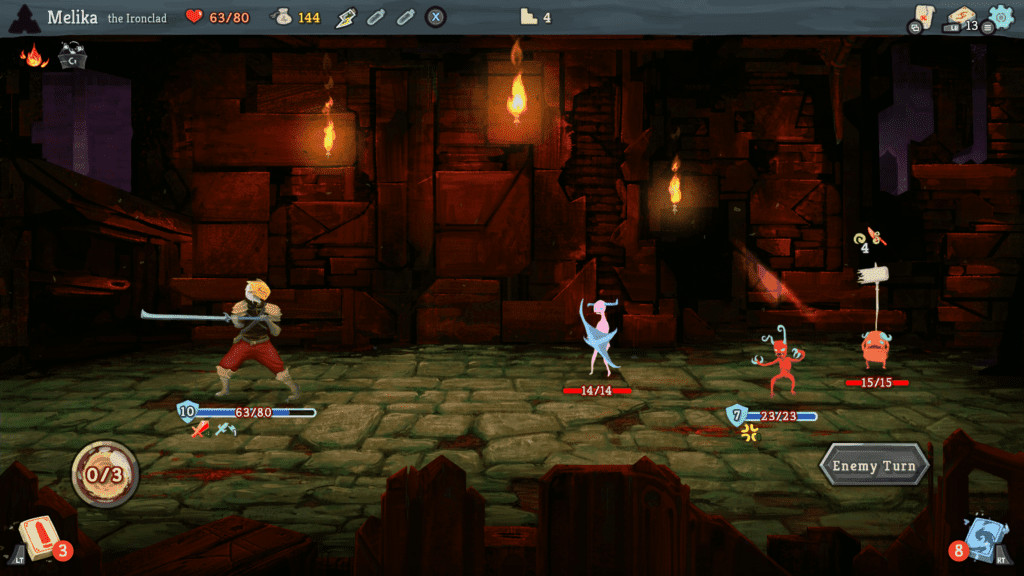
- Dual Wield – Power cards are a staple of burn decks, so getting extra copies of them can be insanely helpful, and Dual Wield allows you to do just that. I’d personally recommend you use it with Rupture if you get the chance.
- Tungsten Rod – This one reduces all HP loss by 1, which can potentially be very useful as most HP Loss cards only deal low-level damage. This could mean you get some great effects without having to pay HP. However, it has an anti-synergy with Rupture, as it would stop it from triggering from cards that only deal 1 HP loss, so you’d need to choose one or the other.
Fun Combos
There are almost endless possibilities for card combinations, but below are some that are definitely worth trying out. I’m also including card and Relic combinations, as they add an extra layer of excitement.
- Flex and Limit Break – Flex is a 0-cost card that adds Strength for one turn only, and then the same amount disappears at the end. By using Limit Break on the same turn, you essentially get to keep the amount that you gain. Limit Break is one of my all-time favorite cards in the game.
- Barricade and Impervious – Impervious adds 40 Block, and Barricade allows you to keep all Block until it’s been depleted, rather than it disappearing at the end of your turn. Impervious does Exhaust, but there’s no reason you can’t bring it back with a card like Exhume.
- Dead Branch and Dark Embrace – These go great together if you’re running an Exhaust deck. Dead Branch is a relic that allows you to get a random card in your hand every time you Exhaust a card, whereas Dark Embrace is a card that allows you to draw from your own deck every time you Exhaust a card. Essentially, you get two new cards in your hand for the price of one. The only downside is that the card you get from Dead Branch may end up being deck clutter, so try to find a way to exhaust that one too.
- Feel No Pain and Fiend Fire – These two cards work well together to deal damage and earn Block simultaneously. Feel No Pain is a Power, which means that when you use it once, it’s applied for the rest of combat. It applies 4 Block every time you Exhaust a card. Meanwhile, Fiend Fire means that you deal damage by Exhausting all the other cards in your hand. This can be an especially decent combo if used in a deck with significant drawing power.
- Barricade and Entrench – Barricade is a convenient card for decks with few Skills, as you can store up Block until you need it. Entrench allows you to double your Block. So if you’ve already amassed a decent amount through using Barricade with cards like Impervious or Panic Button, you can double it to ensure your safety for several turns, all. At the same time, you focus on attacking your enemies rather than having to defend yourself.
- Fiend Fire and Charon’s Ashes – As we’ve discussed, Fiend Fire allows you to exhaust multiple cards in one go. Charon’s Ashes is a Relic that does three damage to all enemies each time you exhaust a card. So while Fiend Fire only targets one enemy, Charon’s Ashes can do damage to all of them, all in the same move.
- Offering and Reaper – Offering costs 6 HP to use, but in return, it allows you to draw cards (thus increasing the chance of getting Reaper in your hand) and get two extra energy, coincidentally the cost of Reaper. Reaper does small damage (4) to all enemies on the field, and you regain that much HP. So as long as you’re facing two or more enemies, this combo ensures you actually gain HP, deal damage to multiple enemies, and draw new cards, all for technically no cost whatsoever.
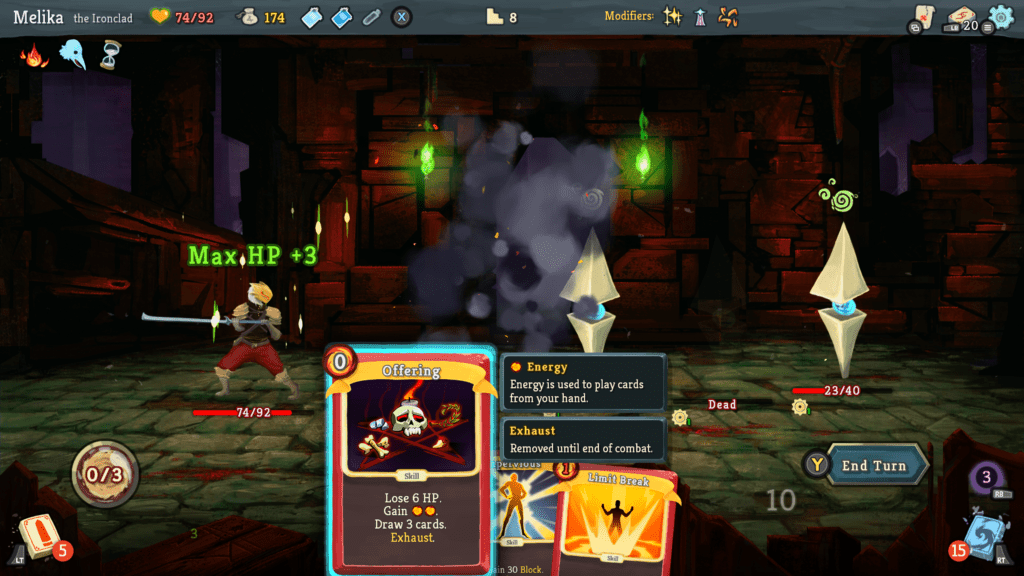
- Brutality and Rupture – Both of these are Power cards, and will happen passively every turn after you play them. Brutality costs 1 HP each turn but allows you to draw an extra card, whereas Rupture gives you additional Strength when you lose HP due to a card.
- Perfected Strike and Wild Strike – The combo doesn’t need to be specifically with Wild Strike, as Perfected Strike has excellent synergy with any card containing the word ‘strike’ (Strike, Wild Strike, Twin Strike, and Perfected Strike). Wild Strike is a fun one, though, as long as you don’t have too many copies of it. With Perfected Strike, you gain extra damage for however many ‘strike’ cards you have in your deck, so if you have a large deck as well as a decent Strength modifier, you can deal plenty of damage this way.
FAQs
Question: What is the Best Card for The Ironclad in Slay the Spire?
Answer: Obviously, this is a subjective question and depends on the rest of your deck. However, many experienced players agree that the best card for The Ironclad is Corruption.
Question: How Many Acts are in Slay the Spire for The Ironclad?
Answer: Like the other characters, you need to play through three acts and beat the Act 3 boss. After that, you’ll go on to face The Heart if you’ve collected all three keys.
Question: What Happens If you Exhaust Your Entire Deck in Slay the Spire?
Answer: Don’t you do it! If you somehow manage to Exhaust all the cards in your deck, then you’ll be stuck waiting for the enemy to eventually kill you. If you’re running an Exhaust deck, balance it well enough to avoid that happening.
Conclusion
Slay the Spire is a complex game that takes a while to get the hang of. This applies even to players with some experience, especially if they’re trying out a new character. I’ve played a lot of runs with The Ironclad, and so hopefully my learned wisdom will help you get a head start on how to play as him. Everyone’s got different preferences in their play style, so don’t try and copy my recommendations exactly. Instead, use them as a starting point for building your own unique decks, and finding out which synergies most appeal to you.
The Ironclad is a great character choice for beginners to Slay the Spire, and there’s a reason Megacrit had him as the first to unlock. His mechanics are generally less complicated than the others, and while playing on the lower Ascension levels; it’s not too difficult to beat the game with The Ironclad. It will likely still take a few attempts to get the hang of it, though, as well as to gain enough progression points to unlock new cards and Relics.
Personally, I find The Ironclad to be a lot of fun, probably the most fun of all of them. While he’s not necessarily the best, he’s a solid choice for both beginners and experienced players. For me, there’s nothing more exciting than watching my Strength modifier get higher and higher, and that’s simply not possible with the other characters. I hope this guide has you excited to play as The Ironclad!
Use this guide to help you slay your way through all the bosses as The Ironclad!
Embark on a thrilling journey through the ever-shifting halls of Slay the Spire, where strategic deck-building meets intense roguelike action. With its dynamic challenges and endless combinations, test your skills and adaptability to ascend to greatness.
- Calico Review – Cats, Coffee, and Cuteness - December 7, 2023
- A Tiny Sticker Tale Review - October 18, 2023
- Paleo Pines Review - October 11, 2023

