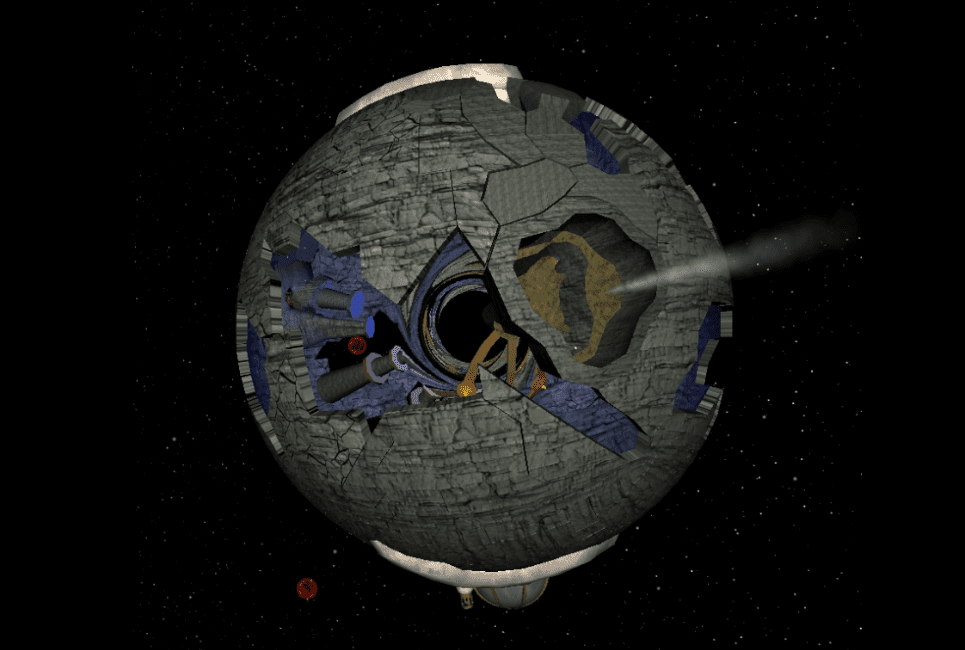
Outer Wilds is an open-world Indie game about exploring a solar system on the verge of destruction. The sun is about to go supernova and take everything with it. And it’s destruction you get to witness again and again. You’re trapped in a 22 minute time loop. That’s 22 minutes to reanimate from the dead, hop back into your ship, find the secrets, and learn lessons that may help you get further in the next 22 minutes. It’s interstellar meets Groundhog Day.
But what makes it so memorable is the nature of the solar system. You’re exploring a selection of celestial bodies designed to show off the changing galaxy or just wow you with mad sci-fi visions. The planets featured in this Outer Wilds planets guide are riddled with hidden locations that change over time. And time, as we just learned, is limited.
Interesting Read: Outer Wilds Walkthrough and Guide.
My Bottom-Line Up Front:
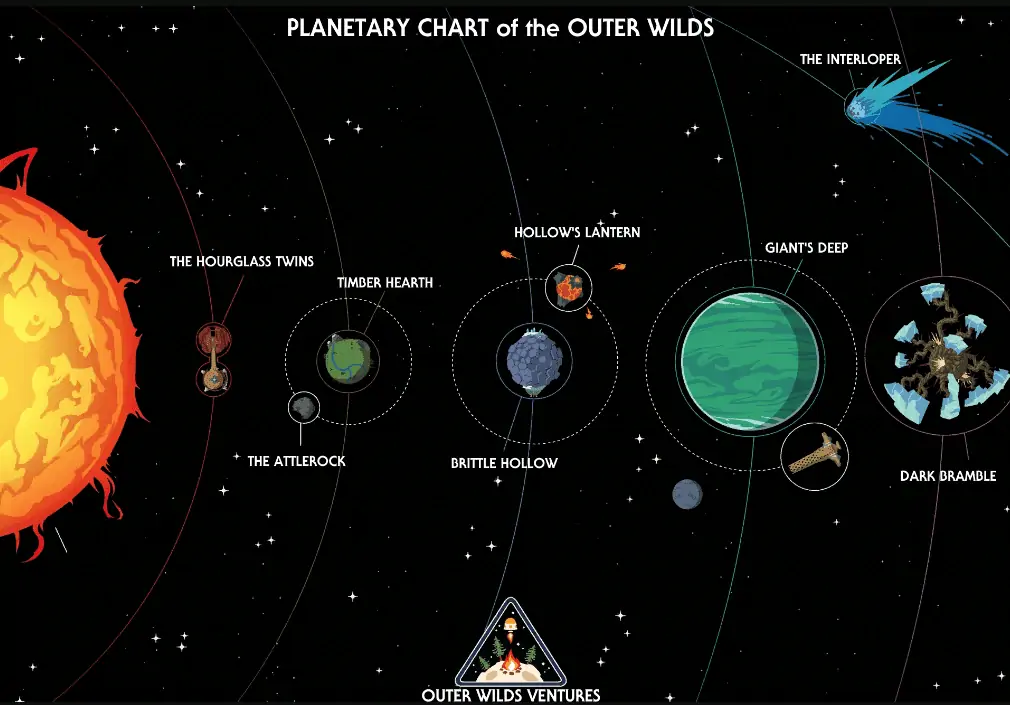
Outer Wilds is set in a small solar system of a few small planets, which may appear unflattering, especially when you think that games like No Man’s Sky offer nothing less than an entire universe. But Outer Wilds is not about recreating hundreds of billions of stars and planets. Its forte lies in a scale infinitely less ambitious in terms of numbers but much more elaborate in both development and narrative.
This guide will go through each Outer Wilds’ planet, learning about its lore and exploring it thoroughly.
Timber Hearth: Home Sweet Home
Timber Hearth is an overall earthlike planet that also serves as a sort of haven for life in its solar system from pole to pole. Timber Hearth is about 276 meters and travels in orbit nine from the sun, whizzing around it at about 216 meters/second. It’s mainly a rocky planet that mimics earth a lot, having actual dirt and rivers and flowers and forests, and you name it. It’s a pretty diverse planet.
Attlerock
Timber Hearth also has a constant companion traveling with it on its journey: the Attlerock, Timber Hearth’s moon, which is tidally locked to its parent body.
Attlerock formed after a giant collision from a meteor hit Timber Hearth, resulting from one of the many craters you see scattered across Timber Hearth’s surface today. Since it was mainly the planet’s surface, the Attlerock holds few valuable metals or materials, earning the moon its name.
That doesn’t mean it doesn’t hold anything of interest. The Attlerock is home to one of the Hearthean’s national treasures, even though everyone in the crater forgets about them.
Esker’s Camp
Esker is the ultimate Outer Wilds explorer if you ask me, being the only Hearthean to set up a freaking house to live in at their new location. It’s nice, with lights, built-in plumbing, and everything. They’ve even grown emergency trees around their house, so they no longer need to wear their spacesuit.
They even have a stash of food, water, and wine, enough to live a lifetime, maybe even two. All in all, Esker’s cabin is an excellent place to waste your time. Watching the solar system on the back patio of Esker’s porch with the pretty potted flowers is a lovely, excellent place to live.
Lunar Lookout
Your kind moon man has also constructed a signal scope platform on the north pole of the Attlerock that they used to spy on people. But despite its more used purpose, it also serves as an excellent place to listen to the music the other travelers are playing throughout the solar system.
No true Hearthean visits the Attlerock and doesn’t see the outer wild adventures flag planted by feldspar on the Hearthean’s first flight to the Attlerock. And right after that, they usually grab a chuckle out of the giant heap of scrap that used to be Esker’s spaceship sitting nearby. Though if I had to guess, I’d say it’s probably more Slate’s fault than Esker’s.
Signal Locator
The last exciting location on Timber Hearth’s satellite is a Nomai room named the Signal Locator, an instrument built to locate the eye of the universe. By searching for auditory signals emitted by it, it’s able to let you hear the going ons of multiple planets as well as the sun. But sadly, it fails when attempting to locate the eye of the universe.
While exploring this scientific instrument, you can find a set of stairs leading down to a floor below. Likely dug out of the animal rock lies a friendly no my room with benches and plants. You can also find a Nomai whiteboard, one scroll wall, and a log from your specie.
Timber Hearth Itself
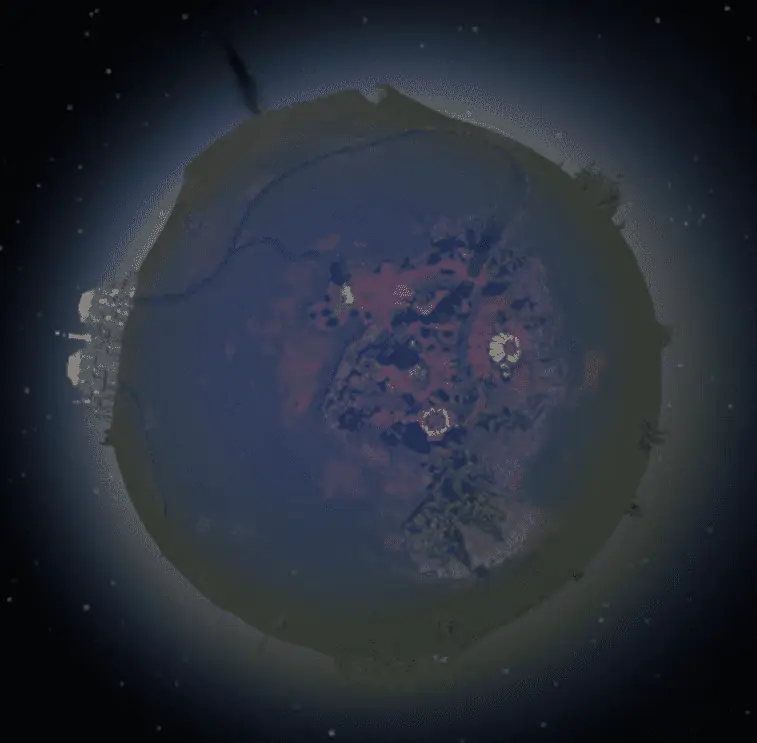
Luckily, Timber Hearth is a planet full of cool stuff.
Many craters on the surface tell you the story of a heavily bombarded planet. One crater, called the quantum grove, is very relaxed. A river leads down to a lake in the middle of a grove of trees. And in the middle of that lake is usually a tiny rock island you can stand on to relax; though, due to a quantum shard being nearby, it and other things may just go ahead and move around.
So keep an eye on that little rock island because it might turn into a geyser and Duncan. This shard made Gabriel choose this location for their quantum poem. A poem with four lines about some ancient glad that we’ve never seen. The exciting bit is that nature allows it to move every time you stop observing the poem and its quantum.
The lines in the poem also change order. So, every time you see the poem, it’ll read differently than the last time you read it. The poem and the quantum fireflies here give the crater a mystical feel. But most Hearthians agree it’s a nice place to be.
Dark Bramble Seed
A new addition to Timber Hearth has recently come hurtling through the atmosphere into an already established crater just on the north pole of the planet. A dark, bramble seed came crashing down, knocking over most nearby trees.
The seed has instantly put down its roots deep into the planet and will only grow from here. This site immediately strikes fear into any Hearthean with an ounce of brain.
Nomai Mines
The Nomai chose this site after one of their initial chosen sites was found to have an aquatic life form. But leave it to the Nomai to make a marvel out of a mine, a cavern almost 100 meters tall with enough walkways built to go all the way around the inner wall.
The mining is done with holes in the ore so immense that you could probably go wide in your heart. And there are probably hundreds of these holes as well.
The Crater
The crowning jewel of Timber Hearth would still be what the Heartheans called the crater if they had not one of the five huge craters on the planet, but the crater, the only home to the Hearthean village, was a single crater.
The Heathens constructed an entire village inside and a space program. In fact, almost everything the Heartheans have ever built has been inside this crater. They have a few platforms tacked on the trees and other craters, but you won’t find a single entire Hearthean building anywhere else on this planet, which is why every Hearthean is more than happy to refer to it as the Crater simply.
The Crater has many cute little log cabin homes which vary in size, but they all seem to have solar power and plumbing connections, and they’re all pretty nice. The town even has a water wheel in the village.
A path leads to the planet’s core and creates what the Heartheans call the Zero-g cave. Inside this cave, you can float around weightless since the forces that generally pull you towards the planet’s core now pull you outwards equally from all sides.
The shell of a vast ancient tree now acts as a base for a launch pad, fully fit with fuel lines and spare tanks to ensure each ship is topped off just before flight. The tree is so tall that you must take an elevator to reach the launch pad.
A spaceflight museum is inside this massive hollow tree just below the launch pad. You can find tools or models the wild auto adventurers use throughout the room to get the job done while exploring space.
This museum sort of pales in comparison to the massive observatory the Hearthean seemed to pride themselves on. While the observatory does house a massive telescope, it also serves as a museum to showcase the archeological and scientific finds of the outer wild adventures.
Brittle Hollow: Don’t Look Up… or Down
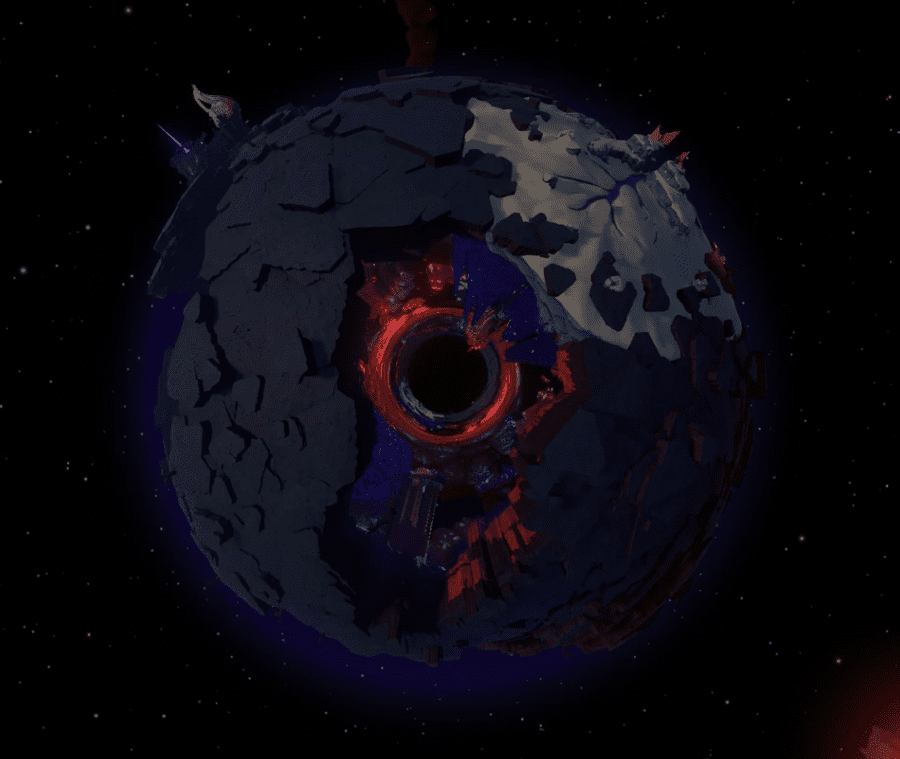
The gravity on Brittle Hollow is quite similar to that on Timber Hearth, being around zero eight or nine on the surface, sometimes dipping as low as zero seven. For some odd reason, it varies. It sits about 12 km from the sun, trotting 185 meters/second around its orbit. It’s more than double the size of Timber Earth. It’s 600 meters pole to pole.
Brittle Hollow has the last natural moon in the solar system named Hollow’s Lantern. With a surface entirely covered by lava and very active volcanoes, this moon is a menace somehow, as if magically refilled by the devil. This thing has been actively bombarding Brittle Hollow with lava rocks for more than 200,000 years, likely a lot longer.
Brittle Hollow is probably one of the most interesting planets in the whole game. It has so much going on that I don’t even know where to start. Maybe with a freaking black hole at its core.
The Black Hole
Brittle Hollow seems to be composed of a crystalline material that’s been hollowed out. The crust of Brittle Hollow has inherent gravitational properties, and this caused spacetime to warp so much that the black hole formed at its center of gravity.
Riebeck’s Camp
If you hear a Banjo, you’re at Riebeck’s camp. He’s got the classic campfire and an existential fear that paralyzes him from further exploring the planet, so I guess it’s up to you.
Escape Pod 1
There is an unmissable, giant alien spaceship on this planet. Further investigation will let you know that it’s Escape Pod one from the Nomai.
Nomai Refuge
Brittle Hollow is, after all, a hollow planet, and the Nomai took full advantage of this, creating wooden walkways and bridges leading below the crust; the Nomai took refuge on naturally formed crystalline shelves. They found a location large enough to construct a temporary city. And for something meant to be temporary, the Nomai did go all out. They even constructed a small building intended to serve as a shrine to the eye of the universe. Connected by bridges, many buildings housed anyone who needed it.
The Hanging City
With the constant bombardment of lava rocks from above, some of the crusts would occasionally fall off and crash to the ground, potentially damaging buildings or, worse, hitting the Nomai living there; they had to find a safer place to build a city.
They built a giant gravity crystal roadway underneath the surface, leading them to the most stable location on the planet, the North Pole. They set just below a polarized cap to construct a city that would permanently house the no my stranded here, which the Nomai named the Hanging city. The melting ice gave them access to all the water needed, and the brilliant citizens quickly began harnessing energy from the black hole below to power their new city. And this city was enormous.
Consisting of four districts, they had enough room to house every Nomai, give them places to relax, conduct classes to teach the younger generations, and an entire district dedicated to worshiping the eye of the universe. The city had about anything you could ask for, aside from freaking guardrails.
The Black Hole Forge
The black hole forge was pretty much the heart of the Nomai civilization. With it, they could create warp corps and eventually recreate the lost technology of the advanced warp core. The Nomai would warp space-time to create and encase a small black hole, and then they would lower it down with the forge to let it interact with the edge of the full-size black hole. After completing this process, they could link it to another warp corps and have instantaneous travel between the two locations.
Southern Observatory
The only way to access this location is a series of gravity wells and gravity crystals underneath the crust, leading you to an underground entrance. The planet’s south pole also serves as one of the most stable locations; rarely being hit by lava rocks, Southern Observatory is a marvel to behold.
On the ground floor are a pool of golden substance and a few replicas of tornadoes found on Giant’s Deep. The roof of the building is a giant glass dome, which visibly makes it possible to see every planet from a single location. But this observatory didn’t have a telescope like the ones the Heartheans have. Instead, they chose to locate the planets through their frequency, as you can do with your signal scope. Each planet has a switch that you can turn on to start tracking that planet.
The Southern Observatory was created with the sole intention of trying to locate the eye of the Universe. But while trying to do so with this machine, it seems to malfunction and shows the eye being in various locations.
Tower of Quantum Knowledge
This tower would likely be considered almost sacred to the Nomai, as it’s dedicated to teaching young Nomads the significance and roles of their journey to the quantum moon’s sixth location. The Tower also serves as a sort of observatory, tracking each planet’s frequency and showing you which planet the quantum moon is currently orbiting.
One of the Tower’s most excellent features is the windows on the first floor. While the Tower is still on Brittle Hollow, it serves as a great view of the crystal crust of the planet, which is a pretty beautiful site.
Giant’s Deep: Scuba Diving as an Astronaut
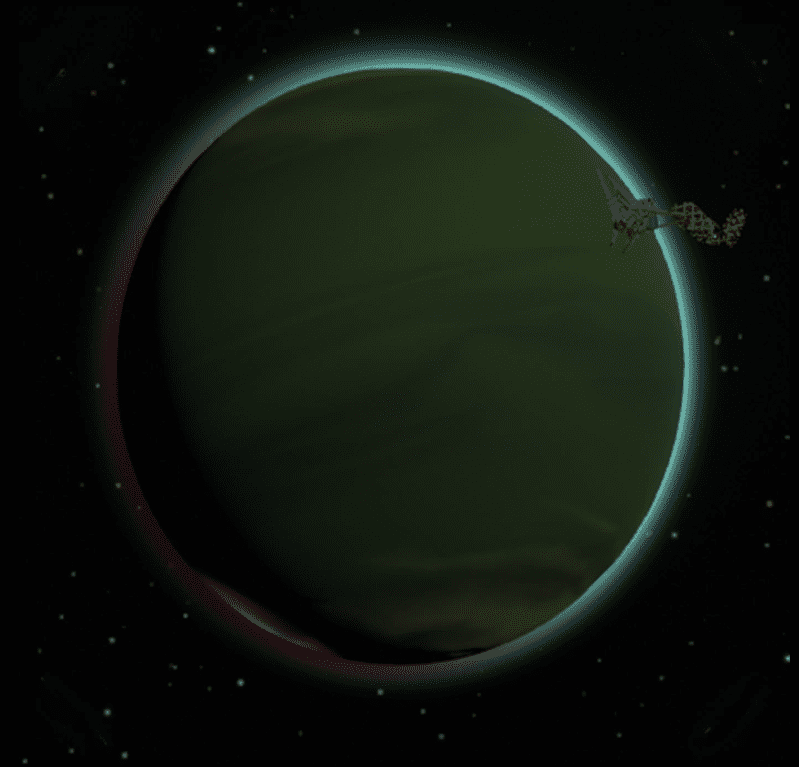
Despite the planet being entirely composed of water and gases, there’s a decent bit to see in this ocean world. With hidden mysteries, islands freely floating around the ocean, and fun mechanics, you have your hands pretty complete with this one.
Staring at it from the outside, it’s like a big ball of swirly green stuff. A behemoth of a planet at 2 km from pole to pole, it’s slugging around in its orbit at 156 meters/second.
It’s unknown what kind of gas composes its atmosphere, but it’s thick and moving. The gas swirls around in pretty mesmerizing ways, and you can see the polar vortex swirling around from space.
Although the atmosphere looks like a thick wall of gas, you can plop through it. Once you do, there’s water as far as the eye can see. Floating randomly throughout the oceans are a handful of islands, giving amazing oceanside views.
But the real fun to the planet comes from these tornadoes. Anything that enters that cyclone will be launched into space, including the islands.
Gabro’s Camp
We should probably check on Gabro, who’s on one of these crazy islands. And Gabriel being Gabro, decided to choose one of the islands made of rock that the Nomai didn’t build anything on. They prefer to rough it in the rain and may be used to it since they can keep a friendly fire roaring in the rain.
And the rain never stops here on Giant’s Deep, so that’s a pretty impressive feat. Their island is pretty typical, however. Some trees, a mountain, a beach, and some pretty flowers. But somehow, Gabriel makes it unique. It’s always fun to watch them get launched by a tornado while in their hammock. And they don’t even miss a beat, literally.
Statue Workshop
This is where the Nomai, teleport to Giant’s Deep, would come for a good reason. This island was another integral part of the Ash Twin projects. The real work being done on the island is in its hollowed-out center.
This is where they would carve the Nomai statues you see throughout the game. A Nomai named Flocks was the master sculptor here, and Doz was able to implement the storing technology into the statues. It’s a pretty important and eye-opening location in the game.
The Quantum Trials
Go into the eye of the giant tornado and visit the 280 meters tall tower of Quantum Trials. It is a tower to be impressed by, and not only visually, but the goal of the entire building is to impress upon you the knowledge that observing a quantum object makes it sure and that viewing an image of a quantum object is the same as viewing the Angel, I mean the object itself.
You go down floor by floor, taking pictures of quantum objects and using them to reach your goal. It’s a pretty exciting way to teach a player something in a game where the only advancement is knowledge. And at the end of the tower, you get greeted by a beautiful mural of two Nomai reaching out to the symbol of the quantum moon.
The Planet’s Core
One of the tornadoes on the planet happens to be spinning counterclockwise, allowing you to get below that impenetrable current running across the planet. Once through, you are greeted by a bunch of happy jellyfish and a giant dark ball of what looks to be electricity itself. It’s just an ultra-dense form of water and gas from the ocean’s pressure.
To get through the electrified layer, you must use one of the jellyfish that has insulation from this electricity. This comes from the fact that jellyfish use it to zap whatever else may be living in the ocean to eat them.
Luckily, they let you swim up their tentacles and into the cavity where their head is, not their stomach. And they don’t eat us. But they let you ride below the current, and you are met with an unsuspected site, at least in my opinion, a humungous coral reef living under more pressure than anything in the solar system.
The Artificial Moon: Orbital Probe Cannon
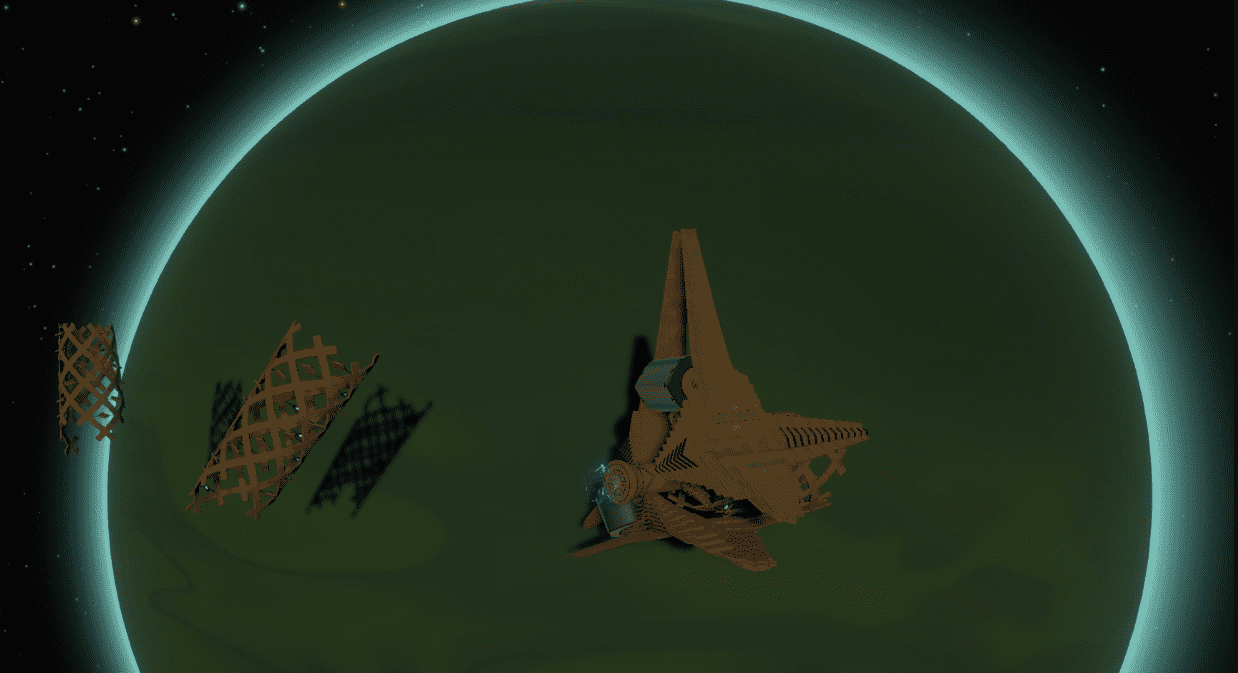
Giant’s Deep doesn’t have a natural moon of its own, but the Nomai must have felt bad for it, so they built the Orbital Probe Cannon as a companion. The Nomai constructed the Orbital Probe Cannon here because of the lack of the moon and how Giant’s Deep, being so far out from the solar system, provides the best angles for launches into deep space.
The Orbital Probe Cannon was integral to the Nomai’s plan to locate the Eye of the Universe. It’s an orbital platform designed to launch and track a probe dedicated to visually finding the eye. But before the interloper exploded, killing all the Nomai, a few overzealous Nomai set the cannon’s power to eleven, and for one glorious moment, that cannon was spectacular. It’s cool to watch it launch from the inside and get the probe angle just zooming off. So, we’ll have to explore the Orbital Probe Cannon in pieces for obvious reasons.
The Missing Tracking Module
Your fundamental goal for coming here is the missing tracking module from the orbital probe cannon. You enter to see an almost identical copy of the other two modules, except this one is in surprisingly good shape for what it’s gone through.
And it holds the third statue connected to the ash twin project, making it unique. You find some logs between the crew of the cannon and one log of private questioning their fellow crewmates’ integrity and morality. But the exciting thing here is the projection pool.
Dark Bramble: The Scary One
What is The Deal With The Dark Bramble?
Dark Bramble is primarily a plant claimed by nature. In the Noclip documentary, one of the artists referred to Dark Bramble as your friendly neighborhood plant, and ever since then, I’ve just been unable to get that out of my head. It is one of the strangest objects in the game, and being a game filled with quantum objects and time travel, that’s saying something.
From the outside, it just looks like a giant plant made of vine, somehow surviving in a vacuum. But if you go into one of the openings at its center, you soon realize that Dark Bramble is more prominent on the inside.
This house plant may not be so benign from the outside. It’s 1.6 km from pole to pole, which is pretty big and composed of vines and thorns. This massive house plant slowly trots around the sun at 141 meters/second.
How Did The Dark Bramble Get Here?
The plant’s entrance to the solar system was a pretty unique one. A long time ago, a tiny seed the size of your ship was shot out of a plant similar to Dark Bramble. This seed exited its original solar system and traveled through the vacuum of space until it eventually collided with this solar system.
An icy planet used to sit where Dark Bramble does today, but the seed collided with this planet and quickly put down roots. The seed eventually grew so big it tore the planet apart, and the only thing left of it now is the remnants of it you find throughout the solar system.
What About That Dark Bramble is That On Timber Hearth?
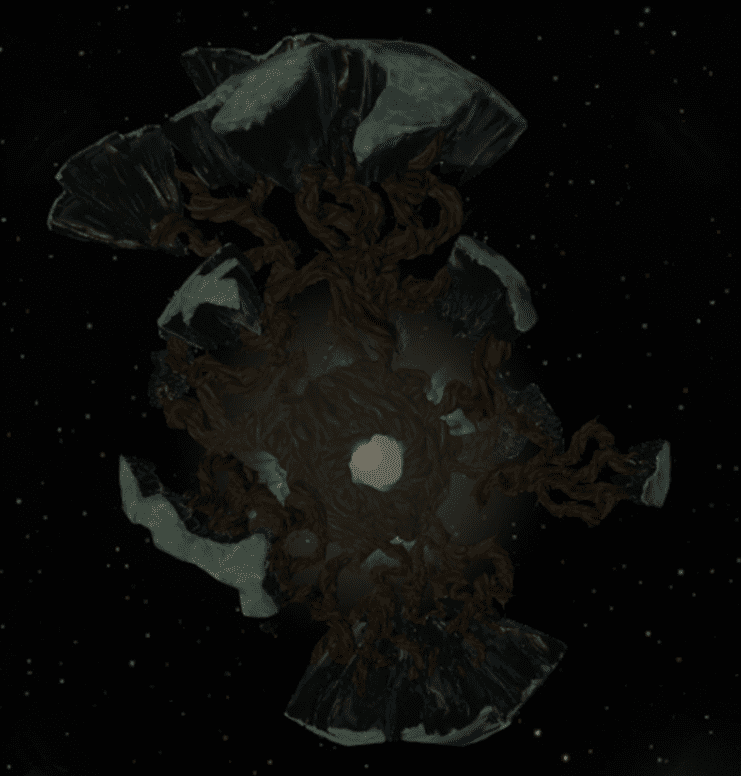
Bramble ran supreme here, and Dark Bramble is trying to continue this process. Bramble has recently sent out a seed, quickly laying roots on Timber. With time, Dark Bramble would expand its network again because not only is Dark Bramble bigger on the inside, but it’s also inter-dimensionally linked to the other Dark Bramble plants in the universe. You can shoot a probe into the seed on Timber Earth and end up across the solar system inside Dark Bramble.
The Anglerfish
This is likely how the seeds and the plants stay alive in the vacuum of space. This network of interdimensional portals provides all of its needs, and they’re probably mostly concealed within the vines themselves. The Dark Bramble network picked up an aggressive fish species along the way. The anglerfish caused trouble for you while trying to explore Dark Bramble and will eat you if they hear you flying by from the outside.
Jellyfish Corpse
You can enter what I call the mother node, which also contains nodes that you can enter. These other nodes’ entrances are smaller seeds; if you get close, you can see what’s inside them. They’re small lights, and each light you see inside a node is a seed or angler fish that’s inside this seed. It isn’t apparent. These nodes are all connected and are essentially an interdimensional maze, so once you know the shortcuts and tricks of the plant, it becomes a bit easier to traverse.
Exploring a bit, you can find a recording from the legendary Feldspar themselves and a note from them inside the head of the jellyfish pleading with anyone who reads this note not to eat this jellyfish, even if the alternative is death. Let me make it clear do not eat this jellyfish. Well, I guess I wouldn’t say I liked it.
Exiting the jellyfish area and following the ice path leads you to a hollow vine which is particularly useful. Entering it and following this vine leads to some fog, and going through it leaves you to Feldspar’s ship.
Feldspard’s Campsite
We find that Feldspard’s death flying resulted in their ship plummeting straight through a vine, giving you access to the interior of Dark Bramble. And nearby to their ship is the legendary Feldspar Campsite, which measures up to the legend. They have set up their camp inside a giant angler fish skeleton with a bramble seat at the center.
Feldspar uses its emergency supplies to survive for an extended period, growing its emergency trees and repurposing its gravity crystal. They have a pretty nice setup here, and apparently, they feel pretty at home. Talking to Feldspar, you can get their take on dark Bramble’s interdimensional maze.
Escape Pod Three And The Vessel
The Nomai tried to flee, but only three out of the five emergency escape pods were able to launch before the Vessel succumbed to the damage the vines were able to do. Around 40% of the Nomai aboard the Vessel didn’t stand a chance and suffocated.
Shortly after this event, escape pod three was able to fire, but multiple collisions altered its trajectory. It eventually hit a vine almost dead on; the propulsion systems were damaged on the pod; the Nomai were stuck. The oxygen on the escape pod was slowly running out, and they had mysterious giant fish starting to get aggressive.
Around 60% of the Nomai who arrived in the solar system upon the Vessel perished in Dark Bramble. Thankfully, the other 40% could survive and split up on separate planets. These Nomai were able to accomplish a lot of impressive things.
The Hourglass Twins: A Binary Planetary System
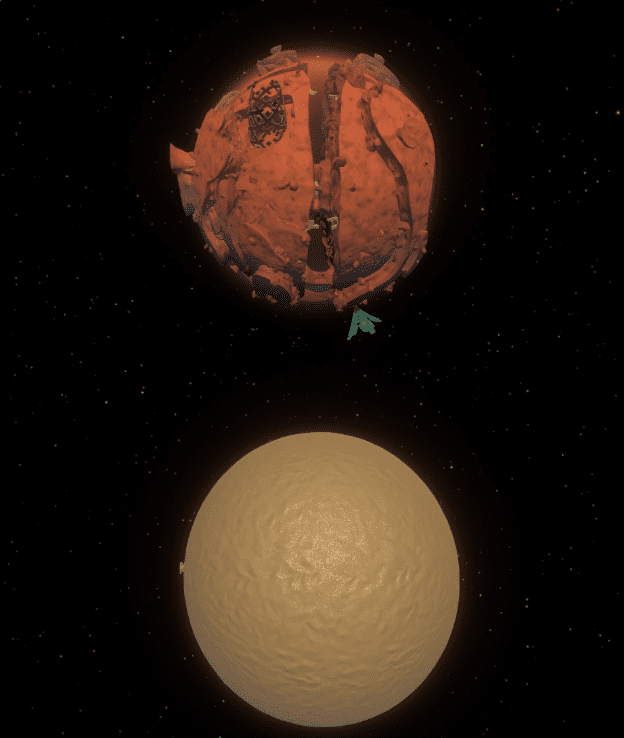
These two planets orbit each other. They are the closest planet to the sun, getting as close as 4.7. Their shared orbit zips around the sun at 259 meters/second orbital velocity.
Their big brother Ember Twin is mainly comprised of red rocky substance. And though its little sister Ash Twin is made out of the same substance, it seems to be a bit weaker there since it’s been worn away over the years.
This mainly left just a giant ball of sand spanning 187 meters from pole to pole. But this sand isn’t always on Ash Twin. Now and again, the sand from Ash Twin will begin tidally, making its way to Ember Twin. This, in essence, forms a giant pillar of sand falling from one planet to the other.
After the sand stays on his twin planet for a while, it eventually returns to the planet it initially began. But while the sand is on Ember Twin, it reveals buildings on Ash Twin’s surface that are usually concealed by the sand.
When the ash twin is empty of sand, you can see the original body is made of the same red rock material as its twin, though it has fared quite differently than its twin, as it mostly seemed to be worn away to some unknown process.
Each twin has a pair of massive solar panels connected by wires that go straight through the entire planet. Ash Twin’s panels have platforms that may have been used to work on the solar panels.
Each has a distinct design, external or internal, that allows you to distinguish which tower leads to which planet.
Ash Twin’s Towers
Sun Tower
The first tower on this pathway is the Sun’s Tower, and it’s cool to watch this tower emerge from the sand as a universal symbol for the sun pokes through.
Cleverly, the towers along the pathway also align with the planets’ order in the solar system. So you know, the next tower on the path is the tower for the planet that is right next to the sun, and that just happens to be the Hourglass twins themselves. Two separate smaller towers signify this on either side of the walkway. The towers each have a teleportation pad on the bottom and a small ramp leading up to the upper floor. However, the ramp on Ash Twin’s Tower has been broken over time.
Timber Hearth’s Tower
Timbers Tower is a simple one, just one floor. There’s not much to see here, but it feels like home again. The shape of the next tower doesn’t seem too important, but it is pretty cool to look at.
Giant’s Deep’s Tower
Giant’s Deep’s Tower is pretty interesting. It’s the only tower you can enter from underneath the walkway and open at the bottom. From there, you can see a giant vertical wall that leads you up to a plain room at the walkway level.
The Ash Twin Project
The excellent location on this planet isn’t really on the planet but inside of it. Using the Ash Twin warp Tower takes you to a fantastic location inside the Ash Twins called the Ash Twin Projects. This is where the solar panels from the poles connect to the Ash twin project and sit within the hollowed-out core of the planet. And within, you can find the ruins that Nomai held as sacred.
The hollowed-out room consists of a rotating walkway that simulates gravity. Along the walkway, you can find some Nomai tech surrounded by giant statues of Nomai masks. You can also find a Nomai statue there as well. This place was the heart of the Nomai plan and served as the hardware that sends information back in time or anything for that matter. But for its relatively simple purpose, the Nomai did make it a location to behold, which is why I saved it as the last location to visit on Ash Twin.
Ember Twin
Looking at Ember Twin from space, it’s pretty interesting. Counterintuitive to the walkway that encircled Ashwin, a canyon encircles this entire planet, having eroded from thousands of years of sand carving away at the rock.
Only a tiny grouping of solid rock at its core keeps the planet hot, and even this is primarily full of sand. But luckily, that rock is holding, and you still have a stable planet to explore.
Escape Pod 2
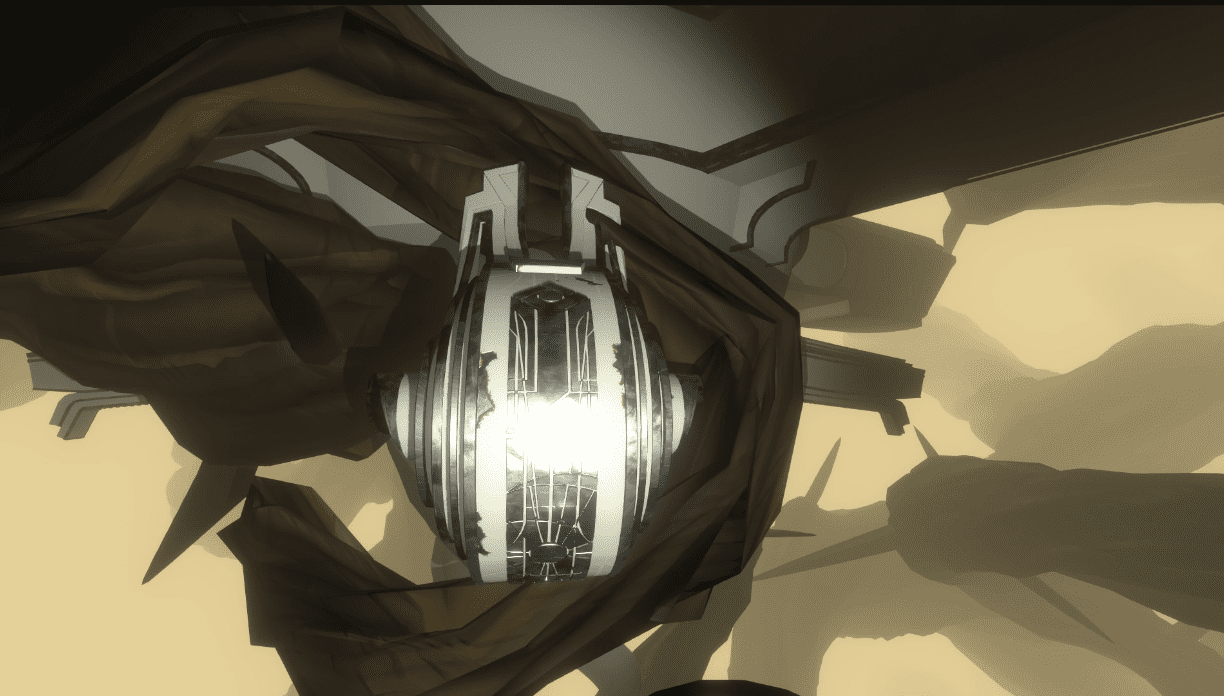
This is an excellent start since it’s beaming a starting point out into space. Here you find the story of the Nomai’s emergency arrival on the planet. But luckily for the Nomai, their escape pod broke right through the planet’s surface and into an extensive cave system below. The interior of Ember Twin is full of winding caves, some even gigantic.
Quantum Moon Locator
Interestingly, the solar panels don’t sit directly on the poles on Ember Twin. Instead, they needed that space to construct a quantum moon locator on the South Pole. It’s a pretty simple device that tracks all of the planets in your solar system through their frequency, and it will tell you which planet the quantum moon is currently orbiting. It’s also an excellent place to go planet watching, so Chert copied them and set up their camp on the North Pole.
Chert’s Camp
They’ve set up their camp on what used to be an island in a bottomless lake. At their camp, you find the usual Hearthian things, their explorer tools, such as their signal scope and little scout. But of course, your species-only astronomer wouldn’t be caught dead without their telescope set up, scanning the cosmetics.
The Caves
Leaping down from Chert’s camp leads you to a specific set of exciting caves. After going through a maze and climbing an endless sandswise, you find the central quantum cave. It’s basically like any of the other caves on Ember Twin.
The Sunless City
The Sunless City is a sight to behold. An entire city was built underground inside of a vast cave system. The city holds many districts in many different locations, and entering from the gravity cannon entrance leaves you right next to the Ice District, mainly one building with many floors, all dedicated to the worshiping of the Eye of the Universe, now covered in ghost matter.
The top floor was for worshiping and deep contemplation on the eye, a place where you can find past conversations of Nomai discussion and debate about the Eye. A wondrous window is carved through the rock, which is fantastic to see outside.
The next district down would be the Anglerfish Overlook District.
I had found the skeleton of an Anglerfish and constructed a room to look down at it. They also got access to the actual room and began studying it. They constructed an entire building above it just for this task.
The district below that would be the Stepping Stone District, a series of pathways that would lead to many actual homes in the city. You can find several homes that were likely carved right out of the rock.
My favorite detail of the city is the ample light that shines on an artificial underground garden. A set of stairs has been carved out of the rock, and on either side are flowers or trees.
FAQ
Question: How many Hours of Gameplay does Outer Wilds have?
Answer: Although Outer Wilds offers a very entertaining experience and the campaign can last about 20 hours, it is much more relaxed than it might seem, so we will enjoy discovering calmly, but not without risks, a universe full of life and very well structured.
Question: Do the Planets in Outer Wilds Change?
Answer: Throughout our journey, we uncover secrets and unravel some of the mysteries of this terrain as the planets change dramatically. Hourglass Twins are filled with sand, and Giant’s Deep is submerged in water.
Question: How Do I Open the Map in Outer Wilds?
Answer: In your ship, there is a station with a computer that compiles all the information that you find, which you can visualize in the form of a rumor map, seeing the connections between the elements of information, or in the form of a system map, seeing it associated with the planet or base to which it refers.
Parting Words
Outer Wilds tinkers with several concepts related to gravity, the atmosphere, and the effects of a careless “landing on the moon.” Even this applies to each of the planets and space artifacts involved in the game. Each planet has its personality, its own rules, and its ecosystems. Each one represents a kind of puzzle in itself.
But there is a massive reward if you decide to put on the astronaut suit and surrender to their charms. The idea of this small, contained universe works wonders. Outer Wilds is a triumph of the handmade over the algorithmic and procedural. It may not have a trillion planets to explore, but the reality is that it doesn’t need them: this, my friends, is a journey that will stay with you for a long, long time. Don’t miss it.
- Indies With Great Accessibility Features - June 19, 2023
- Other Games Like Factorio - February 3, 2023
- Hades Keepsakes Guide: How to Get and Exploit Keepsakes - December 24, 2022

