

As you’ve made your way to this Terraria Class Setups guide, It’s safe to assume you’ve spent a bit of time in Terraria; perhaps you’ve even managed to down a boss or two. But now you feel like it’s time to begin your rise to a near-unkillable, boss-slaying badass. We’re going to be going over all of the classes in Terraria, their strengths, weaknesses, equipment, weapons, and buffs.
Let’s start with the basics. Terraria has no set classes like traditional RPGs. It allows for complete fluidity and freedom to choose your playstyle. Want a giant sword? Say less! Want to fight from range?.. guns or bows? Spell Wizard or Laser gun wizard? Or would you rather sit back and do nothing at all? Summoning it is. If you feel like truly embracing your chaotic side, become a yoyo master.
The true beauty of this game is that you can use all of the above or even create your own hybrid class. However, as you progress through the game and depending on which difficulty you play, I strongly recommend choosing a style to focus on – Unless you’re like myself and will sit for hours grinding for every set in a tier.
If you’ve already decided what you would like to play, just scroll down to the section you need. However, if you’re unsure, my interpretations of the “classic” playstyles will be individually listed with everything you’d need to know. Note that many ore-based armors are covered within the melee section, and detailed information on gathering them will be found there.
Embark on a boundless adventure in the pixelated sandbox world of Terraria, where you can dig, build, and explore to your heart's content. With endless possibilities for creativity and discovery, join millions of players in crafting your own epic journey.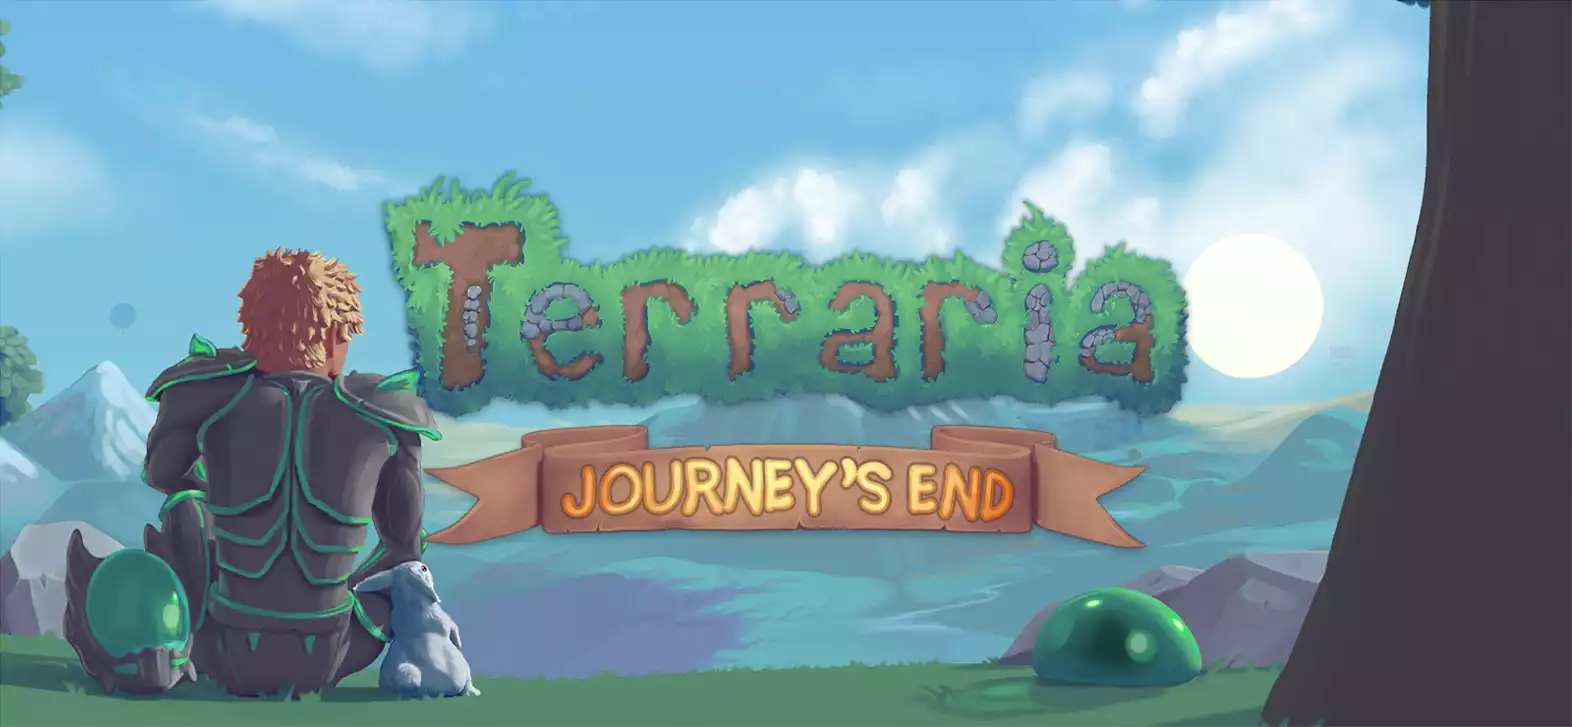
Melee
The melee class hosts the highest defence out of the four traditional classes while still boasting serious damage and crowd control. Most weapons have a low range, meaning you will get hit. Melee users have many weapons, including swords, spears, flails, and yoyos.
Before Hardmode
- Armor: Ancient Shadow Armor / Molten Armor
- Weapon – Blade of Grass / Night’s Edge
- Accessories – Feral Claws + Magma Stone
The Ancient Shadow armor set will take some time and effort; each piece is a 1/525 drop chance from eaters of souls. The complete armor set boasts 19 armor while also providing the user 15% increased movement speed and an additional 7% melee speed per piece, which is extremely useful in the game as they are direct DPS and mobility buffs.
You also get a super cool passive effect where you summon purple bubbles and have an afterimage. In all, it’s a pretty great piece of armor. Your armor is very dependent on which negative biome you spawn with. However, it is still possible to acquire with Crimson biomes.
The Blade of Grass

The blade of grass is by far the best weapon pre-bosses, however, it does require you to spend prolonged periods in the jungle. To new ill-equipped adventures, this may be a challenge; however, the risk is worth the reward.
It has a more extended reach than any other melee weapon in this tier and boasts good speed and knockback with good damage numbers. Its best feature is that it has a chance to apply a poison debuff which will make your first few bosses significantly easier.
To acquire this sword, head to the jungle, collect the glowing “jungle spores”, and kill wasps or bees to collect their stingers. Once you have gathered 12 stingers and 12 spores, combine them on an iron or lead anvil and create the Blade of Grass.
While in the jungle biome, keep an eye out for jungle crates and ivy chests. Opening these gives you the chance to acquire feral claws, which provides you with a stackable 12% melee speed increase.
These combine wonderfully with the blade of grass and ancient shadow armor, allowing you to auto swing (by holding left click instead of clicking individually).
If you’re feeling courageous and don’t mind spending some time digging and dying, you can also journey to the underworld in the hope of finding a Magma Stone.
The Magma Stone

This is easier to do once you have entered Hardmode and killed at least one of the Mechanical bosses. However, it is possible to receive them from pre-Hardmode monsters. To acquire the Magma Stone, create a “hellevator” a tunnel down to the underworld, and begin killing Hellbats.
Hellbats drop the Magma Stone at a drop rate of 0.67%, which can mean that if you are determined to acquire this item, it may take you a while. But I think the extra work is worth the payoff”.
The Magma Stone makes all melee attacks inflict the “hellfire” debuff, which is a more powerful version of the on-fire debuff. Collecting all these items will make the three first three bosses of the game significantly more manageable.
Now it’s time for the weapon upgrade. Before attempting the Wall of Flesh, use the materials you have earned from the other three bosses to begin mining Hellstone in the underworld Obsidian potions are a must here. Use the Hellstone bars to craft the Molten armor.
Use your remaining hellstone to create the Fiery Greatsword, proceed into Skeletron’s dungeon, and keep clearing mobs and gathering keys. The aim is to open chests until you receive the Muramasa. Finally, use your demonite/crimtane to create Lightsbane/Blood Butcherer. Once you have the four blades, head back to an altar and craft Night’s Edge, our final weapon for pre-hard mode.
Before Mechanical Bosses
- Armor – Adamantine or Titanium / Frost Armor
- Weapon – Adamantine or Titanium Sword / Chain Guillotines
- Accessories – Warrior Emblem / Powerglove or Berserkers glove (only available in crimson worlds) / Magma Stone / Wings
Preparation
Now you’ve killed the Wall of Flesh and received your first Pwnhammer, congratulations! You’ve achieved your first significant milestone in your Terraria journey. Now the real game begins. The first thing you want to do is head to your negative biome and start smashing altars.
Smashing your first alter will unlock your first hard mode ore, which will be either Palladium or Cobalt. The game will randomly decide which ores will be available; after breaking your second alter, you will have access to either Mythril or Orichalcum, and finally, after your third Adamantine or Titanium will be available.
Your following tasks will be developing your bases, gathering more NPCs to live in your town, and mining each level of ore, so you have access to all the armor and tools available at this time.
At this point, you get a lot more freedom to use different armor sets and weapons. So experiment with them to fit your playstyle; however, my personal recommendations for melee are below.
Frost Armor

The frost armor is relatively simple to acquire; go to an ice biome, and kill the ice golems until you receive enough cores to create the set. The chain guillotines are personally one of my favorite weapons in the game. However, getting them is easier said than done and requires a decent amount of prep work.
Firstly you need to gather Souls of Night. Most enemies drop Souls of Night within the underground crimson/corruption areas. I recommend gathering as many of these as possible as they have plenty of uses.
The keys require 15 of their souls to create. Once you have collected a decent number of keys, clear yourself an area, place any chest you’d like on the ground, and put a key in it. Once you close the chest, it will transform into a mimic.
These mimics are bigger, badder, and far more dangerous than their naturally spawning counterparts. Give yourself plenty of room to maneuver as they have abilities that allow them to pass through blocks, so you can’t build yourself a safe spot to farm them, for now at least. All you need to do is rinse and repeat until you are a proud owner of the Chain Guillotines.
Before Plantera

- Armor – Turtle Armor
- Weapon – True Night’s Edge / True Excalibur
- Accessories – Warrior Emblem / Fire Gauntlet / Wings
From this point, the melee class starts to come alive. The first thing you need to do is begin mining the luminescent Chlorophyte. This armor set requires 54 Chlorophyte bars and three turtle shells. Turtles will halt your progress, but I promise you that it is worth the wait.
Now let’s move on to the weapons. I strongly suggest you fight the mechanical bosses multiple times to build up a stockpile of Hallowed bars, Souls of Fright, Might and Sight dropped individually from each of them.
First, craft an Excalibur using 12 Hallowed bars, then immediately upgrade it with 24 chlorophyte bars to create True Excalibur. Then take Night’s Edge and use 20 Souls of Fright, Might, and Sight to create True Night’s Edge. You can use either of these swords, but they’re both vital parts of making the Terra Blade.
Before Golem

- Armor – Chlorophyte Armor (with chlorophyte mask)
- Weapon – Terra Blade
- Accessories – Warrior Emblem / Fire Gauntlet / Wings / Ankh Shield
Now to seriously hit the power spike, It’s time to craft the Terra Blade. This is the final weapon that will see you to The Zenith. To craft this, you will be required to kill Mothron, a monster that spawns during the Solar Eclipse event and is only possible to summon after you have killed Plantera and the three mechanical bosses. After killing Mothron, you will be looking for the Broken Hero Sword. Once you have it, head to your anvil and create the Terra Blade, my favorite weapon in the entire game.
While we’re getting one of the best weapons in the game, we should also get arguably the best melee accessory. Get your farming shoes on because this can take a while. Of course, I am talking about the Ankh Shield.
The Ankh Shield provides a decent defensive buff and immunity to bleeding, broken armor, burning, confusion, cursed, darkness, poisoned, silenced, slow, weak, and chilly. So as you can imagine, it’s pretty great.
Firstly you need an obsidian skull. Get 20 obsidian and a cobalt shield which you can obtain from the dungeon. Now you begin the treasure hunt. You need to acquire Vitamins and Armor Polish which you will turn into Armor Bracing. Next, you need an Adhesive Bandage and a Bezoar to create a Medicated Bandage.
Then a Nazar and a Megaphone for the Countercurse Mantra. Finally, the Trifold Map and the Fast Clock to create The Plan. Once these items are collected, combine them to create an Ankh Charm and attach it with the Obsidian Shield to make the Ankh Shield.
Before Moonlord

- Armor – Beetle Armor
- Weapon – Terra Blade
- Accessories – Avenger Emblem / Fire Gauntlet / Wings / Ankh Shield
We’re now close to completing your journey through Terraria. Firstly kill the Golem a few more times to gather Beetle Husks, and yes, I’m not sure why a statue drops beetle husks either, but we move.
When you have 26 husks, combine them with your turtle armor, and you have the Beetle Set. However, you don’t gain a lot of DPS stats. The sheer defensibility of the set more than makes up for it.
I have taught you and suggested what I can. But experiment with what feels suitable for you. Reaching this point, you will have gained a strong understanding of the game. So now, go and defeat the Moonlord and claim your power! From here, I will leave the rest to you.
Ranged
Before Bosses

- Armor – Fossil Armor
- Weapon – Best bow available to your current ore / Minishark Gun
- Accessories/Ammo – Frostburn Arrows / Highest quality bullet
Ranged is a popular playstyle within Terraria, boasting extremely great damage at the trade-off of a lower defense, meaning you have to put a lot more thought into kiting and dodging.
To start, head to the desert and mine fossils until you have 60 sturdy fossils. Then continue exploring until you find bullets or a firearm. Build a house, and the Arms dealer should arrive.
Kill things until you have 35 gold, and buy the Minishark. This weapon is the primary building block to many higher-tier guns and will help many bosses. Then buy as many bullets as you can, or craft them and try to get to silver/tungsten bullets as quickly as possible.
If you choose to go the bow route, simply craft the best bows available. Head to the arctic and mine some ice, combine with torches to create Ice Torches, and finally combine with arrows to make Frostburn Arrows.
Before Hardmode

- Armor – Necro Armor
- Weapon – Star Cannon/Beenade
- Accessories/Ammo – Ammo box / Fallen Stars/ Meteor Shot
After killing Skeletron, head into the dungeon and gather 135 cobwebs and 150 bones. Use this to create the necro armor, which increases your damage output and looks excellent, so your fashion will be on point from here.
Next, we will work towards Beenades, which will make the wall of flesh feel like a bit of a joke. Build a sky bridge across your base to start collecting stars to make this easier. You cannot have enough. Then use 20 meteorite bars, five fallen stars, and the Minishark to create the star cannon.
Note that this uses stars as ammo and fires quickly, so build up a stockpile. Now head to the jungle and find a beehive. Kill the Queen Bee and collect beeswax. Combine with grenades which can be bought from the Demolitionist. With these items, the Wall of Flesh will be a breeze!
Before Mech

- Armor – Adamantite Armor / Frost Armor
- Weapon – Star Cannon / Onyx Blaster/ Daedalus Stormbow
- Accessories – Ranger Emblem / Molten or Stalkers Quiver / Endless Musket Pouch / Ichor Bullet
Look at this same section in the melee category for getting the frost armor for the armor.
Craft the Onyx Blaster using a shotgun, two dark shards, and ten Souls of Night. This weapon is super effective at this point of the game and is my recommendation for killing the mechanical bosses. However, you can also choose the Daedalus Storm bow, which requires you to spawn Hallowed Mimics.
Most enemies drop souls of Light within the underground Hallow areas. I recommend gathering as many of these as possible as they have plenty of uses. The keys require 15 of their souls to create.
Once you have collected a decent number of keys, clear yourself an area, place any chest you’d like on the ground, and put a key in it.
When you close the chest, it will transform into a mimic. Keep it at range, rinse and repeat until you have the Storm bow. Combined with Frostfire / Hellfire arrows and this weapon comes alive.
Before Plantera

- Armor – Chlorophyte Armor (with Chlorophyte Helmet)
- Weapon – Megashark
- Accessories – Chlorophyte bullets / Ranger Emblem / Wings
Read the before the Plantera section in the Melee column for the specifics on how to get the Chlorophyte armor.
The megashark is the next weapon we’re moving towards. Not only is this weapon awesome, but when combined with Chlorophyte bullets, it truly becomes a menace to monsters.
Buy some illegal gun parts from the arms dealer at Night, collect some shark fins from the ocean, sprinkle in 20 Souls of Might, and combine with the Minishark (you’ll have to buy another) you have created its older brother, the Megashark.
The megashark has a high rate of fire and good damage, but the chlorophyte bullets take this to the next level. Chlorophyte bullets are self aiming heat-seeking rounds of green bliss. Kiting can’t get much easier as you barely need to aim anymore. I use these bullets in the endgame.
Before Golem

- Armor – Shroomite Armor
- Weapon – Megashark
- Accessories – Chlorophyte bullets / Ranger Emblem / Wings
Prepare to make your best Captain Price impression because “Rainbow 6 is going dark” Of course, I refer to Shroomite Armor.
To craft Shroomite, collect the glowing blue mushrooms in the underground mushroom biome and combine them with Chlorophyte bars. I think this is one of the best-looking armor sets in the game.
The helmets are simple to remember—headgear for arrows, Shroomite Mask for bullets, and the Shroomite Helmet for rockets.
Before Moonlord

- Armor – Shroomite Armor
- Weapon – Xenopopper / Chain gun
- Accessories – Ranger Emblem / Wings/ Sniper Scope / Chlorophyte Bullets
Now, the Golem is defeated. This is the part where we tend to start farming events which brings us to our following two weapons. The chain gun is my favorite; who doesn’t like a minigun with heat-seeking bullets?
The chain guns rate of fire is ridiculous, and you truly begin to feel like a monster. It drops from Santa-NK1 during the frost moon event, and you can’t help but appreciate the Futurama reference.
Alternatively, you can aim for the Xenopopper. A weapon dropped by the Martian Madness event. It shoots bubbles that convert into bullets. What’s not to like about this tier?
Magic
Before Bosses

- Armor – Diamond Robe + Magic hat / Wizard hat
- Weapon – Ruby Staff / Emerald Staff
- Accessories – Magic Cuffs / Mana Flower
This tier of Magic is a bit rough. You will spend most of your time collecting fallen stars to increase your mana pool. Explore caverns to collect gemstones, keep an eye out for Tim, a skeletal mage and steal his hat. Wait for the traveling merchant and hope you get lucky on the times.
Before Hardmode

- Armor – Meteor Armor
- Weapon – Diamond Staff / Gray Zapinator
- Accessories – Celestial Cuffs / Mana Flower / Magnet Flower
The class slowly starts to come alive at this point, but it’s still a long way from its full potential. Mine the meteor and create the Meteor armor, which will significantly help gameplay.
Upgrade your staff to a diamond version which will slowly begin to scale. Keep an eye for the traveling merchant as the class is very dependent on some items sold by them. One of which can be a helpful start is the Gray Zapinator.
Before Mech

- Armor – Adamantite Armor / Titanium Armor
- Weapon – Meteor Staff / Sky Fracture / Golden Shower
- Accessories – Celestial Cuffs / Sorcerer Emblem / Magnet Flower
From here, Magic becomes a lot more viable. See the melee section for more information on gathering the armor. But from here, we begin getting some good weapons. My personal favorite is the meteor staff.
It requires 20 Meteorite bars, 10 Pixie Dust, and 10 Souls of Light and lets you rain meteors down from the sky. Sky Fracture is a magical sword that fires more magical swords at your enemies.
To craft this, take a Magic missile found in dungeon chests and combine it with two shards of Light and 16 Souls of Light. Finally, the spell The Golden shower.
You can acquire this in two ways: a drop from jungle mimics or by crafting it with a spell tome, 20 ichor, and 15 Soul of Night. These three weapons will see you to Golem.
Before Plantera

- Armor – Chlorophyte Armor (with Headgear)
- Weapon – Meteor Staff / Sky Fracture / Golden Shower
- Accessories – Celestial Cuffs / Celestial Emblem / Magnet Flower / Wings
Simply upgrade your armor to Chlorophyte. For more details, look at the melee section of this guide.
Before Golem

- Armor – Spectre Armor
- Weapon – Bat Sceptre / Spectre Staff / Inferno Fork
- Accessories – Celestial Cuffs / Celestial Emblem / Magnet Flower / Wings
Magic begins to come into its own from here, and that is because of Spectre Armor. Spectre armor is an exciting set due to its helmets. The Spectre mask creates homing orbs that deal damage to monsters, whereas the Spectre hood creates life-stealing orbs that restore health to the player/players at a 40% damage reduction.
Most magic users build both and constantly switch between the two to both heal and deal severe damage. The Spectre Staff and the Inferno fork are dropped in the dungeon after killing Plantera. However, the Bat Sceptre is gained from the Pumpkings, spawned during the Pumpkin Moon event.
Before Moonlord

- Armor – Spectre Armor
- Weapon – Razorpine
- Accessories – Celestial Cuffs / Celestial Emblem / Magnet Flower / Wings
The Razorpine has the highest DPS out of all of the magical weapons. It is even beating the Nebula Blaze, one of the magic weapons dropped by Moonlord.
Although it is a rare drop from Everscreams during the Frost Moon event, it is more than worth the time.
Summoner
Before Bosses
.gif)
- Armor – Flinx Fur Coat
- Weapon – Finch Staff / Snapthorn
- Accessories – Whatever you like!
Summoner is a slow burner but is often the favorite class for AFK farming. Often people will run this class next to their main. The Flinx Fur Coat will be our first choice in armor, as it is the only piece at this tier that improves summoning damage.
To craft this, head to the arctic, kill some fluffy boys, collect 8 Flinx Fur, convert cobwebs into silk, add eight gold/platinum bars on a loom, and you’re golden. Next, search for giant trees and open as many chests as you can in the hopes of getting a Finch staff.
Finally, enter the jungle, collect 12 stingers, two vines, and three jungle spores and make the Snapthorn. This will act as your spammable weapon while you have your summons active.
Before Hardmode

- Armor – Obsidian Armor
- Weapon – Imp Staff and Spinal Tap
- Accessories – Pygmy Necklace / Feral Claws
Now that you’ve killed the first three bosses, it’s time to prepare for The Wall of Flesh. Firstly head deep underground and collect 60 obsidian, enough cobwebs to make 30 silk and use 20 of the shadow scales/tissue samples you received as drops from the bosses and combine to make the Obsidian Armor.
This armor fits the active summons and uses the whip playstyle with less AFK but far greater damage. Speaking of whips, get another 55 cobwebs and 90 bones to create the Spinal Tap whip. You can find feral claws in the jungle, and finally, the Pygmy Necklace, which is a +1 to active minions, can be bought by the Witch Doctor for 20 gold at Night.
Before Mech
- Armor – Obsidian Armor / Spider Armor
- Weapon – Blade Staff / Firecracker
- Accessories – Summoner Emblem / Pygmy Necklace
You can decide to either continue the Whip playstyle and stick with the Obsidian Armor, or you can now pivot into a less active, minion-focused build. I enjoy the minion route. To craft the Spider armor, head to the underground web clusters and kill the black recluse spiders. They have a unique sprite, so they’re easy to spot. Collect at least 36 fangs. However, if you want to build the queen spider staff, collect an extra 24.
Now to get the summon item that will see you to the end of the game. The Blade staff’s minions have an incredibly fast attack rate compared to every other summon and also have a mechanic that ignores the enemy’s defense and stacks with accessories that provide damage ignoring effects.
To get this staff, head to the underground hollow and kill enchanted swords for a more AFK way to farm it; however, it can take a while at a 2.8% drop rate. There is a second way to get the item: killing the Queen Slime boss, which has a far higher drop chance.
The Firecracker is dropped from the wall of flesh, so wait for the guide to respawn and kill it a few more times to get it to drop. This gear will see you to Golem.
Before Plantera

- Armor – Spider Armor
- Weapon – Blade Staff / Firecracker
- Accessories – Summoner Emblem / Pygmy Necklace / Berserker’s Gloves
Look in the melee section for more information on how to acquire the Berserkers Gloves. All you need to do is prepare yourself to fight the overgrown plant.
Before Golem

- Armor – Spooky Armor
- Weapon – Blade Staff / Dark Harvest
- Accessories – Summoner Emblem / Hercules Beetle / Papyrus Scarab / Necromantic Scroll / Pygmy Necklace
In this tier, we’re going to be farming the pumpkin moon a lot; you need to gather 750 Spooky wood from the event and kill Pumpkings for the chance to get the Dark Harvest Whip to drop while also hoping for a couple of Necromantic Scrolls. This is a bit of a time sink, so good luck.
If you receive all this, you will be in a great place. Buy 2 Hercules Beetles from the Witchdoctor in the jungle. Combine one with a necromantic scroll to create the Papyrus scroll and finally equip them all
Before Moonlord

- Armor – Spooky Armor
- Weapon – Xeno Staff / Dark Harvest
- Accessories – Summoner Emblem / Hercules Beetle / Papyrus Scarab / Necromantic Scroll / Pygmy Necklace
The only upgrade for you to earn here pre Moonlord is upgrading to the Xeno Staff. To get this, farm the Martian Madness event and destroy Martian Saucers until it drops! Happy hunting!
FAQ
Question: How do I farm events? Do they only happen randomly?
Answer: There are a few times within this article where I mention farming events. Most events in the game are repeatable, thanks to items you can craft in-game. For example, you can make a Pumpkin Moon Medallion using pumpkins, ectoplasm, and hallowed bars. So if you want to farm an event multiple times, craft the summoning item.
Question: I’m following the guide to a letter, but I’m still struggling to defeat the bosses. What can I do?
Answer: Practice does make perfect, and the more familiar you are with the boss mechanics, the easier it gets. I also recommended you look into buffing potions and buff tables. Finally, it is pretty standard practice to make “arenas,” which are large areas with multiple layers of platforms that allow you to move around and avoid abilities without clipping on anything.
Question: I can’t find a meteor in my world?
Answer: A meteor will have a chance to spawn randomly every day once you have defeated the Eater of Worlds or Brain of Cthulhu. It also requires a pickaxe of Gold or higher to mine.
Final Words
Now you should be fully equipped for your Terraria adventure regardless of what class you go to, and the true joy of this game is that you can follow this guide thoroughly or go your own way. Just remember to enjoy the journey!
Embark on a boundless adventure in the pixelated sandbox world of Terraria, where you can dig, build, and explore to your heart's content. With endless possibilities for creativity and discovery, join millions of players in crafting your own epic journey.
- Terraria Class Setups Guide - May 29, 2022