
Hades is one of the most beloved and revered Roguelites on the market. Underneath a surface of stunning graphics and beautifully written characters lurks a surprisingly tricky game with powerful bosses gatekeeping each level.
I guess that last part is why you’re here! Compared to most Underworld denizens you can muscle your way past; each Boss brings new challenges to the table. In this Hades Bosses Guide, I’ll be going through what you need to look out for in every boss fight, including their most dangerous attacks and how to hit them where it hurts!
Games Like Hades
 |
 |
 |
|
4.6
|
4.1
|
4.2
|
Before Fighting The Bosses

I’ll explain how to deal with each Boss in detail in ‘The Bosses’ section of the guide. Before you start, there are a few essential things to know, as they may change how you approach combat.
Hades Awards Aggressive Play
One pitfall I see many new players fall into is playing too cautiously. I’m not saying you should brazenly run into fights because you WILL die, but sometimes a good offense is the best defense.
Most of the bosses are capable of filling the screen with projectiles. A lot of the time, you’ll be able to end a fight quicker if you take the odd hit on the chin. Aggression can be a better strategy than sheepishly skirting the arena and trying to hit your opponent from afar.
The Power of Speed
Even if you’re cruising through the Underworld with a dream build, ensure you’re not neglecting your movement! It’s always worth picking up a Boon or two from Hermes, as many of them will allow you to avoid damage entirely.
I’m always hunting for Greatest Reflex as Zagreus feels much more responsive with extra dashes. If you can’t get that, Quick Recovery and Hyper Sprint will make you feel a lot tankier. Hermes has a few situational Boons, but he’s worth visiting every run.
Check out this guide with everything you should know about Zagreus.
The Mirror of Night
Even if you’re a seasoned Hades player, the deck is stacked against you on your first run through the game. Hades’ entire early gameplay loop revolves around getting stronger and building your base stats.
There’s no ‘wrong’ way to use the Mirror of Night, but going for abilities like Death Defiance and Chthonic Vitality will help keep you alive in combat. Greater Reflex gives Zagreus an extra dash, which is something you desperately want early.
Extreme Measures
‘Extreme Measures’ is one of the Conditions you can activate on the ‘Pact of Punishment’ before you begin a run. It’s a good Condition because it adds a decent amount of Heat to your run, but each rank transforms a boss battle into a more challenging version. I’ll be covering these in each specific boss section. If you’ve not got the Pact of Punishment unlocked yet, it will appear after beating the game for the first time.
The Bosses
In this section, I’ll be unraveling each Boss encounter in the order they appear during a run. Your strategies will depend on your weapon and aspect. Play to your strengths, but if you have a decent knowledge of what the bosses are capable of, you can fight on your terms.
Megaera, The Fury

I don’t think there’s a Hades player out there who doesn’t like Meg! Megaera is one of the three Fury Sisters and the first Boss you’ll encounter in the game. If you’re just starting, don’t be discouraged if Meg kicks you back to the House a few times. With a few Mirror of Night upgrades and practice, victory will be yours!
Meg only has a few attacks, and she’s vulnerable for a brief period after each of them. This is the time you want to attack! There are only a few attacks you need to look out for in this fight, and they are as follows:
Lunge
The attack that will probably throw you off guard is Meg’s ‘Lunge’, where she makes a short beeline straight for Zagreus. Meg telegraphs this attack by briefly lowering her stance like a runner on a race track. If it connects, you’ll take a decent chunk of damage, but it’s not too tricky to avoid with a dash.
Whip Whirl

This attack is a little scary because it hits a wide area. The Whip Whirl starts with a long twirling jump straight into the air. Keep an eye out for this, as it’s your cue to give Meg some space! You have ample time to dash away and try to sneak in some cheeky damage afterwards.
Volley
Meg aims a volley of purple shots at Zagreus and loosely tracks him wherever he moves. If you’re using the Shield, you can just kick back and relax as it deflects everything. The projectiles don’t hurt much but can add up if you’re careless. If you’re struggling to avoid them, there is more space between them if you stand back.
Fire Attack

If you’ve ever played an MMO, you’ll probably feel at home avoiding this attack. Meg paints several circles on the ground that explode in flames. This is arguably the hardest attack to dodge as the rings can feel random. Keep calm and dash away from them if they appear underneath your feet
Weak enemies will periodically spawn during this fight, and they can start to make the arena feel rather crowded. If you’re dishing out good damage, you can ignore them but don’t be afraid to attack them if you’re getting overwhelmed.
Alecto

Alecto has a chance to replace Megaera as the Stage 1 Boss once the story has been advanced enough. She’s fast, dangerous and very aggressive.
Whereas Megaera seems to throw a lot of attacks out in the hopes that you might bump into them, Alecto will relentlessly pursue you with targeted attacks. This extra aggression makes Alecto the most challenging of the Furies.
Lunge
Alecto has a Lunge attack that’s similar to Megaeras. Like before, if you see Alecto lowering her stance, ensure you’re not standing directly in front of her!
Wing Attack
It’s a little hard to determine what’s going on in this attack as it’s pretty fast, but it looks like Alecto is trying to slice at you with her wing. This attack isn’t telegraphed for very long, so if Alecto is running at you, this is one to expect. It doesn’t do much damage, but constant hits will add up.
Blade Rift
Alecto can summon Blade Rifts (similar to the ones you can get from Aries Boons). These slowly creep around the arena. As you may expect, these hurt if you bump into them and knock you back slightly, so try your best to stay away.
Volley
Alecto’s Volley also functions similarly to Megaeras, although this one doesn’t track. Stay back if you want to play safely, as the projectiles are further apart at range.
Rage Mode
I wasn’t kidding when I said Alecto was aggressive! This encounter revolves around her Rage meter, which builds up during the fight. When it’s full, Alecto will briefly become invincible, and she gains access to a few nasty moves. These moves are a constant threat until the Rage meter subsides. Alecto also gains permanent Rage when her health falls below 25%.
Running is a decent strategy in this fight and gives you a chance to catch a breather. If you’re lucky, Alecto will also hurt herself on some of the spike traps on the ground! Alecto briefly pauses after most of her attacks, and this is your window to retaliate.
Tisiphone

Last but not least, we have Tisiphone, who’s famously short on words and wants to ‘Murrdurrr‘ you! In this fight, the arena shrinks, and it’s a little disorientating because the screen fades to black each time. The shrinking makes it much harder to play passively, so I recommend getting aggressive to finish the fight quickly.
Tisiphone’s attacks share similarities with others we have covered already, but one to watch out for is her Dash. Tisiphone can dash in a long straight line leaving projectiles in its wake. This attack is nicely telegraphed by Tisiphone spinning her whip around.
Like her sisters, Tisiphone can also paint explosive circles on the ground. Thanks to the small arena, they can be tough to avoid. You’re free to fight back after each attack, but as it’s very easy to get hit here, I suggest going for those risky hits too.
The Furies (Extreme Measures)

As explained in the ‘Core Mechanics’ part of the guide, Extreme Measures make the Boss fights much harder. This fight’s transformation is fantastic and makes for an incredibly intense battle.
In the fight against the Furies, the sisters have finally learned they can’t beat you alone and instead come at you all at once! There are many ways this fight can play out, but there will always be one sister who takes the lead. This sister will act as she would if you were facing her normally.
The other two sisters behave as backup and will throw unique attacks into the mix. I’ve done this fight hundreds of times, and the leading sister and her backup seem random.
Playing a solid mix of offense and defense in this fight is essential. You want to end the battle quickly, but running is the best option if the arena is just getting out of hand. You can only damage the main sister, so don’t waste your time on the others.
Lernaean Bone Hydra, AKA Lernie!

Compared to all the variables of the first Boss, this one is much simpler. The fight will always be against Lernie, and unless you have Extreme Measures active, the battle will be almost identical every time.
The Bone Hydra fight has phases that trigger whenever he loses about 1/3 of his health. There is no way to over-damage the Boss to skip phases (like in Cuphead, for example), so the fight will always go as follows:
Phase One
Lernie can throw a slow volley of projectiles or go for a slam with its chin. The slam is telegraphed well in advance, and you can dodge projectiles by standing behind the pillars. After you’ve knocked Lernie’s health down by about 1/3, it will gain a shield that grants invincibility until you deal with its minions.
Phase Two

Three Mini Hydras will emerge from the river of lava around the bottom of the arena. All three will shoot projectiles at you, so you’ll need to stay on your toes. They can be tricky to dodge, but fortunately, they don’t have much health. Go on the offensive between their volleys, and refocus your efforts on Lernie once you’ve defeated them.
Phase 3
Lernie’s volley now fires more projectiles, which are faster too. You can hide behind the pillars as before, and you’ll definitely want to, as this attack hurts if you get hit multiple times. Once you’ve beaten the Boss down to its final 1/3 health, it will become invulnerable once again.
Phase 4

This phase is arguably the most challenging part of the fight. There are now 6 Mini Hydras to deal with! Fighting from the middle is risky as you’ll take fire from every direction. The easiest way to deal with the Hydras is to pick a side, start there and work your way across. You’ll still get shot at, but only by a couple at once.
Phase 5
The Bone Hydra gets one final upgrade here as his chin slam now hits multiple times. The strategy remains the same as before, cautiously step in for attacks and use the pillars for cover. Even if you’re careless, you shouldn’t get hit too much here, and once you’re victorious, you’re free to progress to Elysium, where things really start to get tough!
Variations
Upon defeating this Boss 3 times, the Mini Hydras become color-coded to signify different attacks they can use. Don’t worry too much about them, as they still have a tiny health pool. As long as you’re fighting them one at a time, you’ll be absolutely fine.
Bone Hydra (Extreme Measures)

The Extreme Measures version of this fight is one that most Speedrunners go for because it’s faster! In this variation, Lernie sits in the middle of the arena instead of against the back wall. The arena is notably smaller this time too, which makes dodging much harder.
The big difference here is the Mini Hydras group up in the middle instead of around the edges. This means you can hit them all simultaneously to finish the fight faster. The downside is the encounter is more chaotic as you have to deal with concentrated fire.
The Bone Hydra usually ends up being the most straightforward Extreme Measures fight, as by now, your build is likely taking shape quite nicely.
Theseus and Asterius, the Bull of Minos

The Theseus and Asterius Boss battle marks a significant step up in difficulty. Both are extremely dangerous, and keeping your attention divided between them is quite the task! You’ll want to split the bosses up; fortunately, they do half the work for you.
I’ll go through each of their move sets in just a moment, but Asterius likes to chase you whilst Theseus prefers to galavant in front of the crowds and attack from afar. I prefer fighting at the bottom of the arena for visibility, but if Theseus goes down there, you may have to improvise. You will want to defeat Asterius first because Theseus gains a dangerous new move when he reaches half health.
As you’ll be focusing your efforts on Asterius to start with, I’ll cover his moves first:
Asterius

Axe Combo
Asterius loves getting up close and personal in this fight, and you must ensure this doesn’t happen. He can attack with two wide cleaving blows with his axe followed by a homing slam. He can slam multiple times, and it can’t be interrupted. Stay out of range but be ready to land a few free hits just after the slam.
Bull Rush
Asterius will simply chase you until he crashes into something. Dash around the pillars and make sure that ‘something’ is the scenery, not you. That crash will stun Asterius for a few seconds giving you an excellent opportunity to deal damage. If you’re struggling, Zagreus can dash through the pillars without you needing to go around.
Theseus

If you don’t hate Theseus enough for his gaudy taunts, you’ll hate him for his fighting style! Theseus is annoying and demands patience if you want to beat him. The issue is his Shield that he never drops, meaning you must attack him from behind. It’s rather demoralizing to see your attacks bounce off but keep the damage up, stay mobile, and you will win eventually! Here’s what you need to look out for:
Spear Throw
You always know this is coming because a pink cross-hair will appear over Zagreus. Theseus is deadly accurate, so you’ll need to get a pillar between you to avoid getting hit. Dodging the Spear isn’t too bad, but it can be tricky if Asterius is chasing you.
Spin Attack
The Spin Attack is scary because of its wide range. Theseus will quickly draw a circle around himself before lunging at you with a spin of his Spear. This attack hurts, but if you see it coming, a couple of dashes away is usually enough to make it miss.
Calling For Aid
This ability is why it’s always best to defeat Asterius first. When Theseus is down to 50% health, he cries for help and wow, does he get it! A random god comes to his aid and engulfs the arena in unique attacks. Painted circles on the ground telegraph these, and they can appear anywhere. If Asterius is chasing you whilst this is happening, it’s an absolute nightmare, so make defeating him your priority.
In this final phase, Theseus pauses from time to time, giving you ample opportunity to land some hits. I usually save my Call for this phase as the sooner it’s over, the better!
Theseus and Asterius (Extreme Measures)

If you’re brave enough to fight this delinquent duo with Extreme Measures on, be aware that you’re walking into one of the most challenging fights in the game! Asterius adorns a suit of gold armor, and Theseus has… A motorized chariot with mini-guns on the front?
Asterius
The best way to describe Extreme Measures Asterius is ‘On Steroids!’. His previous slam attack has been upgraded with a large shockwave when he lands. Asterius also has a new Spin Attack with insane range and feels like it goes on for an age! Keep as much distance as you can.
You’ll be pleased to know that aside from a little extra speed, the Bull Rush is basically the same as it was before and still gives you a prime opportunity to land some damage immediately afterwards.
Theseus
If Theseus somehow doesn’t make your blood boil already, this should do it! Theseus drives around the arena in his ridiculous chariot and has access to a few new attacks. Theseus can use the chariot guns and fire a volley of high-speed projectiles. You’re better off trying to dodge the whole volley than weaving through the shots at range.
Theseus can also unleash a barrage of explosives that paint huge circles on the ground before exploding. If these line the arena’s edges, the whole play area feels much smaller, and it’s very hard not to get hit by attacks from all over.
Fortunately, when Theseus is down to 50% health, he calls for aid and reverts to his standard final form. This phase is still difficult to deal with, but at least it should feel familiar! As before, I still find dealing with Asterius first to be optimal, but it’s much harder with Extreme Measures.
Everything is coming at you in this fight, and you’re going to get overwhelmed constantly. Try to ensure you always have a way out and space to move. Play as safely as you can, and when Asterius falls, you can pivot to a more offensive playstyle.
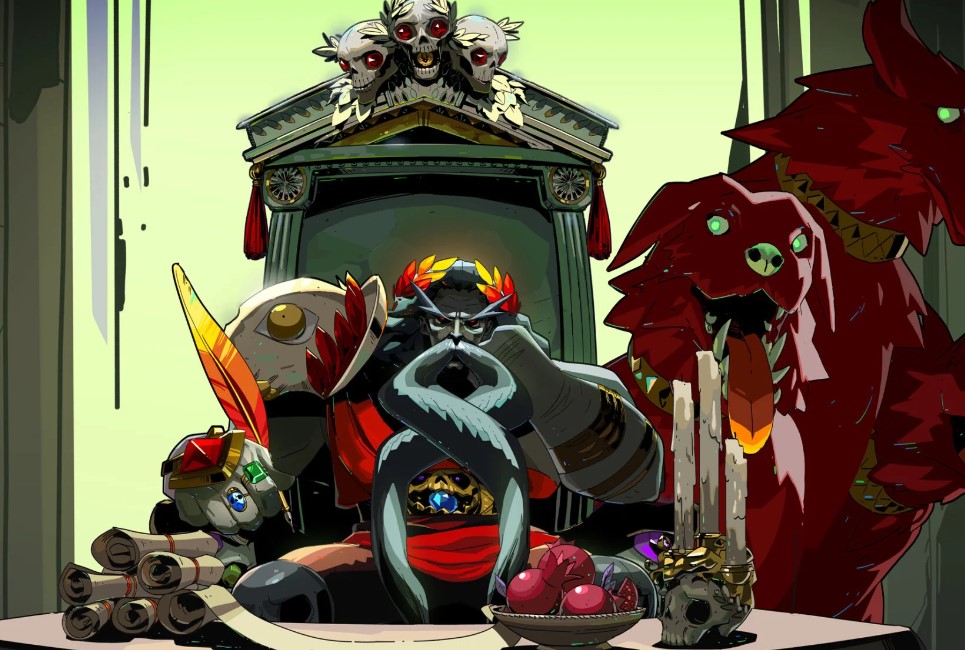
Hades

Unless you have an incredibly broken build, Hades is tough. This is the most brutal fight in the game, and no matter how prepared you think you are, Hades will put you in your place if you’re careless. Here’s what you’re up against:
Spin Attack
This move is almost identical to Theseus’s Spin Attack. Hades will briefly draw a circle around himself before lunging with a spinning spear attack. This attack hurts a lot so do everything you can to avoid it.
Lunge
Hades can make a nasty lunge attack with his spear. It has a limited range but is incredibly fast and obnoxious to avoid. You can dash through and behind Hades for some easy hits if you’re quick.
Skulls (Boiling Blood)

If you’re wondering how your health bar is getting demolished so fast in this fight, it’s because of these. Hades can throw Skulls that slightly track your position. If you get hit, the screen gains a shattered glass effect. You take double damage whilst this effect is active, so play cautiously.
Summoning Reinforcements
Hades will summon enemies to help him through the fight. They aren’t a threat on their own, but if they grab your attention long enough for Hades to hit you, they’ve already done their job. If you’ve failed against Hades a few times, I recommend killing these when they appear. The battle will take longer, but they can’t interfere this way.
Hades: Phase Two

Surely you didn’t think the lord of the Underworld would go down that easily?
Hades comes back with a vengeance after you knock him down for the first time. He regains all of his health and has a host of new and far more dangerous attacks.
Spear Combo
Hades can do a three-hit combo consisting of 2 broad arcing sweeps followed by the spin attack from earlier. This combo hurts and covers a wide area too. Your best bet is to dash to the side or straight through Hades if he starts this attack.
Lasers

Hades can now fire a barrage of intimidating lasers, and the lower Hades’ health falls, the more lasers there are. You can technically get in close to do damage here, but the much safer strategy is to hide behind a piece of scenery and wait. The only good thing about this attack is Hades takes a few moments to wind down after doing it, making it a great time to counterattack.
Urns
The last ace up Hades’ sleeve is his Urn attack. Hades can Summon urns onto the battlefield that will explode upon taking damage. The explosion covers the floor nearby with a ‘grasping’ puddle that slows and hurts you. You can decide if you want to break them pre-emptively, but they can become a real problem when Hades uses his Laser attack.

There’s a lot to remember in the Hades fight, and it will take a while to get the balance of offense and defense right. With perseverance, I know you can do it! And once you have, you’ll have beaten one of the best Roguelites out there!
Hades (Extreme Measures)

Well, you wanted punishment, I guess! Hades moves faster, hits harder and feels like he’s had upgrades to every part of his kit. He also has a tremendous amount of health. Hades now throws two spin attacks in sequence instead of one, and you’ll need to dash far away to avoid it.
Hades can also throw his spear. It’s barely telegraphed and does an insane amount of damage. Your best bet is to be proactive and dash as much as possible.
Even Hades minions have had an upgrade, and you’ll recognize them as mini-bosses from all areas of the Underworld. Speaking of minions, Hades can call on Cerberus to stampede across the map! Cerberus isn’t too tough to avoid, but the rocks that fall around him are.
Finally, as if Hades wasn’t strong enough, he now has an extra phase, and it’s in the dark! This fight is borderline unfair and will take all of your skill.
Hades hits so hard and has so much health that you have to play flawlessly if you want any chance of winning.
Nothing feels as good as beating the most challenging fight in the game and if you’re successful, pat yourself on the back because it’s no easy feat!
Frequently Asked Questions
Question: Who is the hardest Boss in Hades?
Answer: Without a doubt, the big daddy himself, Hades. Hades hits like a truck, has multiple attacks you need to learn and react to and has a multi-phase battle. He’s brutal, and with Extreme Measures on, he’s sadistic.
Question: What’s the best way to learn the Boss’s attacks?
Answer: It may mean giving up a run for the greater good, but dashing around each arena without attacking is a great way to practice. Combat in Hades can get hard to follow with so much going on, but if you just run around and focus on dodging attacks, you’ll learn a ton!
Question: I can’t beat ___ no matter what I do. Help!
Answer: You can turn on ‘God Mode’ in the options menu if you’re struggling. This mode gives you some damage resistance which increases each time you fail.
Useful Resources
If you’re not interested in grinding for those valuable ‘Mirror of Night’ upgrades, you can download a 100% complete game file. The file only works on PC and will ruin the story, but if you’re happy with that, you can find one here
The wiki has in-depth numerical values for some boss attacks if you want a deeper look into the combat. You can find that here.
Conclusion
Mirror of Night upgrades will help you enormously in Hades, but they aren’t a replacement for game knowledge and skill. Every Boss has a few attacks up their sleeves, and once you’ve memorized those, there’s no fight you can’t overcome.
Games Like Hades
|
|
|
|
|
4.6
|
4.1
|
4.2
|
Related Hades guides:
- Best Co-op Indie Games: Why Play Alone When You Can Dominate as a Team? - February 22, 2024
- Top 15 Best Bullet Heaven Games - November 22, 2023
- Terra Nil developers donate $95,000 to Endangered Wildlife Trust - July 21, 2023