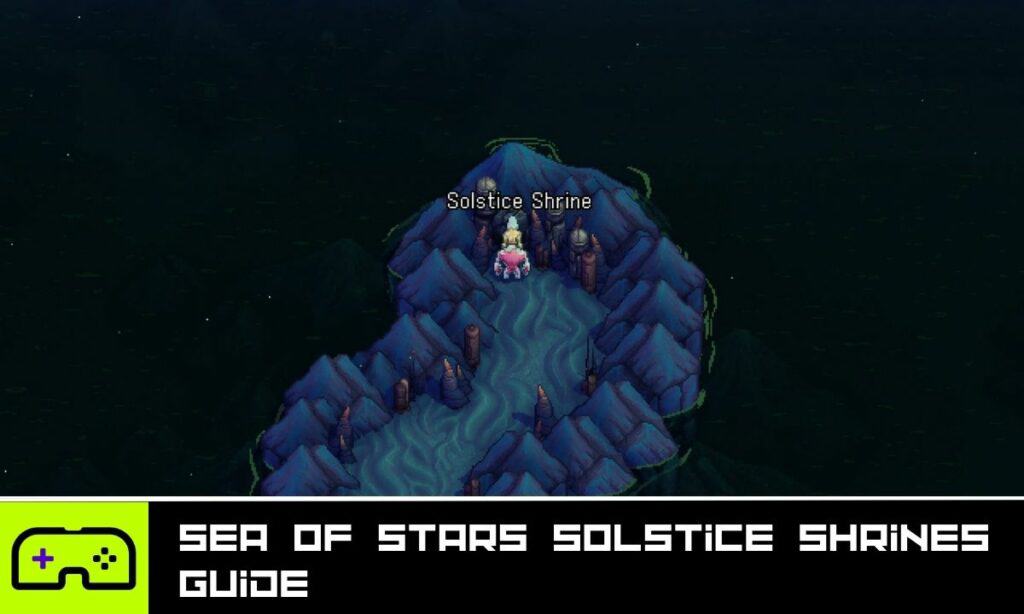
Sea of Stars is a pretty linear game when compared to a lot of other retro turn-based RPGS. However, the game always gives you plenty of reasons to go off the beaten track in search of optional challenges along the way. Challenges that usually lead to some fun puzzles and some welcome loot for your efforts. That being said, the game doesn’t exactly guide you by the hand, meaning you’ll have to make note of interesting points of interest for later, and that is true of the five Solstice Shrines dotted around the map.
These Shrines are self-contained puzzles that, when solved, will offer loot to the player, while also getting you one step closer to a much more grand reward that can only be collected after you’ve found and solved all the Solstice Chamber puzzles. The puzzles themselves aren’t overly perplexing, but we reckon you guys could use a hand finding these areas, solving the puzzles, and also could benefit from some directions to the area where the big reward is being kept too.
So, with that in mind, here is Indie Game Culture’s Sea of Stars Solstice Shrines Guide!
Games Like Sea of Stars
|
4.6
|
3.3
|
4.5
|
Solstice Shrine Locations
The Solstice Chamber locations are pretty obvious right from the start of the game. Heck, you’ll even walk straight past one on your way to the Forbidden Cavern. However, you can’t access any of them until much later in the game. You can gain access to two Solstice Shrines after you unlock Mirth, and then you’ll need to wait until you can fly around the map before you can access the rest. That being said, it’s good to have a note of where they are, so here are the locations below:
Solstice Shrine One

- Location: Evermist Island
- Requirements: Solstice Chamber Key (Gained From Elder Moraine)
Solstice Shrine Two

- Location: Wraith Island
- Requirements: Day/Night Cycle Ability
Solstice Shrine Three

- Location: Island Near Skyward Spine
- Requirements: Ability to Fly (Valere and Zale)
Solstice Shrine Four

- Location: Island Near Sleeper Island
- Requirements: Ability to Fly (Valere and Zale)
Solstice Shrine Five

- Location: Island In Serai’s World
- Requirements: Ability to Fly (Valere and Zale) + Access through Sea of Stars
Solving the Solstice Shrine Puzzles
Solstice Shrine #1

We begin with the first Solstice Shrine, which is all the way back where we started the game. After you get the key from Elder Moraine, you can make your way back there, and you might want to do that sooner rather than later, as the reward for this one is pretty sweet.
When you head back and open up this Shrine, you’ll be greeted by the first of five puzzles you’ll need to conquer. This one will make use of the Mistral Bracelet and have you maneuver pillars to move a crystal-looking pillar across a set path. Only by using the solid pillars as stopping points will you be able to have the crystal pillar go where you need it to. Go off the desired path, and the crystal cube returns to the beginning, so exercise caution.
Knowing this, the process is pretty straightforward, but for a point of reference, use the image above as a guide
Solstice Shrine #2
Next, we have the Solstice Shrine on Wraith Island. This one will have you use a blend of platforming and careful use of items to get to the chest at the top of the room. First, begin by heading right and hopping on the lowest platform. This will cause it to lower, and the one on the left to raise, allowing you to grab the first Solstice Shrine Key.
After that, you’ll want to tug on the lever to reset the puzzle, then insert the key into the circular panel shown below.

After this, clamber onto the platform you first climbed up on again, and this will allow you to climb up to the second Solstice Shrine Key on the left-hand side of the room. You’ll then want to remove the one on the left and take it with you to the right-hand side of the room and place it in the slot in the far right corner of the room. This will allow you to climb up the right-sided platforms and reach the highest slot, which you should slot the remaining Solstice Shrine key into

This will lock everything in place and allow you to platform all the way up the left-hand side of the room and get your hands on the chest at the top of the room.

Solstice Shrine #3

We then have the first of the two island puzzles, and of the two, this one is probably the easiest. This one will have you use your day/night cycle power to grow vine shoots, or reveal platforms to gradually make your way around the area, pulling levers to unveil the chest locked behind bars at ground level.
There isn’t really a fail state or any sort of intense cognitive function needed for this one. Just take your time, play around with the lunar and solar rays, and only jump when you are sure of your path to the desired destination.
Solstice Shrine #4
Then, as for the second of the two main world Solstice Shrine Islands, we have a puzzle that will have you play an off-brand version of Dance, Dance Revolution, to get where you need to go. Not literally, though, so you can put the dancing shoes away.
Firstly, you’ll need to get to the right-hand side of the room. You can see that the greyed out panels are the ones I stepped on, so follow this to get over to the right.

Then, after pressing the button, hop off the edge, and you’ll reset the puzzle. Then comes the time to work to the left of the room. Here is the way I did that below.

After that, you just need to head to the platform in the middle and collect your reward. I won’t patronize you with a solution to get to the middle, as it’s pretty straightforward and can be done in multiple ways without too much cerebral action. Only one more to go now!
Solstice Shrine #5
For this final Solstice Shrine, we will need to head across the Sea of Stars to Serai’s world. I would argue that this one is probably the hardest of the five puzzles on offer and a little bit confusing at first, as the puzzle logic takes a second to get your head around.
How this one works is you have a panel in the middle that controls a series of floating stone tiles, which will serve as your path to the chest. So you need to move the stone cube with your Mistral Bracelet to maneuver the tiles where you need to press buttons on the left and right-hand side of the room, which, in turn, will allow you to move the tiles with less restriction.
To get to the left of the room, you’ll need to set up like this:

Then to get to the right of the room, you’ll need to go with this setup and use your Graplou to cover the distance between:

Then, after you have full mobility, you can then set up your cubes like so to traverse the cavernous drop and make your way to the chest on the other side of the room.

Congrats, you have solved all the Solstice Shrine Puzzles, but hey, you aren’t done yet!
The Spoils – Solstice Shrine Rewards
Before we talk about the end-game content that unlocks after beating all of these puzzle shrines, here is a breakdown of the rewards you will get for solving each puzzle:
- Shrine #1 – Soonarnag Combo – Lunar and Solar magic projectile that can bounce to multiple targets.
- Shrine #2 – Solstice Sash – Magic Attack +7.
- Shrine #3 – Heliacal Earrings – M. ATK +10 Sunball does full damage to splash targets.
- Shrine #4 – Eclipse Armor
- Shrine #5 – Celestial Ray – M. ATK +5 Regular attacks regenerate +1 MP
The Battle With the Elder Mist
If you’ve been paying attention, you’ll have noticed that every time you completed a puzzle, there has been a cut scene showing lights appearing on an old rune. Well, after you have solved all the Solstice Shrine Puzzles, you’ll want to go and seek that Rune out. The quickest way to find this one is to start from the area where you met the Elder Mist, and then work backward through the Mountain Trail. Eventually, you will happen upon a cave on the mountainside, and within that cave, is this rune. Interact with it, and The Elder Mist will appear.

It is at this point that he will inform you that there is one final challenge. You will have to fight him just as you did at the start of the game, only this time, he’s a lot tougher. Plus, you can only use Zale and Valere in this fight, so you need to manage the fight very well.
The key to winning this fight is much like the initial battle. You will need to focus primarily on his Sword Arm, taking it out before you attack the Elder Mist himself. The reason being that, if you ignore the arm, he will counter-attack every time you land a direct hit, regardless of any move timers, and unless you packed a lot of high HP restoring recipes, this could spell the end for you.

Also, you need to make sure that you are using splash damage attacks when taking out the Sword Arm, as this will take chunks off The Elder Mist’s health without any quick retaliation. Plus, you have to remain aware of his locks too. Try to keep some Live Mana in play, keep combo points available for moves like Soonarang and Solstice Strike, as these are vital, and don’t be afraid to play defensive and use moves like Mending Light and Lunar Shield.
If you play this one right, you’ll come away with the victory, and you will be rewarded with the strongest respective weapons for both Zale and Valere, the Moon Bo, and the Sun Blade.
The Boon of the Sun and Moon
As you can see, there is ample reason to get out there and access all the Solstice Shrines dotted around the world, as the individual rewards will help you progress through the main game, and the late-game Shrines will grant some killer items to help tie up the loose strings with ease. I hope that this guide has allowed you to make sense of the puzzles within, and as always, thanks for reading IGC!
FAQ Section
Question: Why Can’t I Access the Islands?
Answer: The reason why you can’t access the islands with Solstice Shrines on them is by design. You can only access these ahead of the final battle when you gain the power to fly freely around the map.
Question: What’s the Best Reward?
Answer: Personally, I’m a big fan of the Heliacal Earrings, because there’s something pretty cathartic about using Sunball. However, most of the rewards offered are beneficial.
Question: Why Is the First Chamber Locked?
Answer: It is locked because you need to progress the story until you are given a key to the first accessible chamber. Plus, you’ll need to trek all the way back through the starting island, which is a bit of a pain.
Games Like Sea of Stars
|
4.6
|
3.3
|
4.5
|
Continue reading:
- Sea Of Stars Fishing Guide – Reel ‘Em In
- Sea of Stars Recipes Guide – Garl’s Kitchen Is Open For Business
- Sea of Stars Wheels Guide – Spin The Wheels
- Sea of Stars Question Packs Guide
- Sea of Stars Rainbow Conch Locations
- Best Indie Open World Games To Play In 2024 - February 28, 2024
- Most Wholesome Indie Games - February 22, 2024
- Best Indie Walking Simulators: 20 Indie Strolls To Remember - February 22, 2024


